|
~Watermelon Half~
This tutorial assumes that
you have a working knowledge of Paintshop Pro 6.02. You can download a
30 day trial at www.jasc.com.
Open a new transparent image
in PSP that is 300X300, 16.7 million colors. This gives you enough
room to work with. You can crop it down later.
Set your foreground color to
green #48642F, and click on your Preset Shapes Tool  and in the Tool Options, set the Shape Type to "Ellipse,"
and Style to "Filled," and Line width to "1," and
check the Antialias.
and in the Tool Options, set the Shape Type to "Ellipse,"
and Style to "Filled," and Line width to "1," and
check the Antialias.

On your image, place your
cursor at (150, 135). The numbers at the bottom of your screen should
read:  .
Then at that point, click your mouse and hold the button down and drag
it down and to the right until the bottom of
your screen says (160, 100). .
Then at that point, click your mouse and hold the button down and drag
it down and to the right until the bottom of
your screen says (160, 100). 
Now let go of your button and
you should have a green watermelon shape on your image.

Now change your foreground
color to a light gray, #D5CDCD. Click on your Preset Shapes Tool
again, and with the same settings, go to your image and set your
cursor at (150, 135) again, and this time drag your cursor down and to
the right until you get to (156, 94)  .
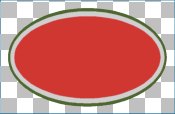
You should now have this: .
You should now have this:

Change your foreground color
to red, #CE3737 and select your Preset Shapes once again, with the
same settings, and go to your image and set your cursor at (150, 135),
and drag your cursor down and to the right until you get to (148, 84). You should end up with this:
Double Click on your
"Selection Tool"  so that the Select Area window opens up, and set the Right to 300, the
Bottom to 135, and leave the left and Top set to 0. Then click OK. The
top half of your image should be selected.
so that the Select Area window opens up, and set the Right to 300, the
Bottom to 135, and leave the left and Top set to 0. Then click OK. The
top half of your image should be selected.

Press the "Delete"
key on your key board and the top half of your watermelon should now
be gone.

With the top half still
selected, click on the Retouch tool  and set the Tool Options to Shape:Round, Size:4,
Hardness:77, Opacity:64, Step:25, Density:100. On the Second tab, set
the Retouch mode to "Soften," Paper Texture to
"None," and Build up Brush is checked.
and set the Tool Options to Shape:Round, Size:4,
Hardness:77, Opacity:64, Step:25, Density:100. On the Second tab, set
the Retouch mode to "Soften," Paper Texture to
"None," and Build up Brush is checked.

Now you need to use the
retouch tool to blend the red and the white line together, so the rind
of the melon doesn't look so sharp. So, blend along the rind of the
melon where the red stops and the white begins. I don't know how else
to explain this part, but you should end up with something like this:

You can go to Select/select
none. Now we need to make the seeds.
|