Crackle Finish on Egg

From Debbie Fodor.....

      Well I have been experimenting on pieces of ostrich shell. I think probably somebody can perfect this technique better than me. I'm sorry the pictures are so bad but I just laid them on the scanner (believe me they look a lot better in real life).


  • 1. If you want the pores to show through the crackling rub brown oil paint on the shell and then remove with paint thinner, let dry. (You should have brown spots).

  • 2. Cover your shell completely with Weldbond Glue, do not dilute, let dry.

  • 3. Now mix Corn Starch with flecto Varathane. I'm not sure what the measurements are but I make it the consistency of a really heavy cream.

  • 4. Spread evenly as you can on your shell (I use my fingers).

  • 5. Now this is the tricky part. If you want small cracks leave and let it dry. If you want larger cracks you have to put on another coat. However, wait until the mixture looks dry but hasn't started cracking then add the next. Please experiment with pieces first and then you well know what I'm taking about. It's fun watching the crack happen, give it time.

  • 6. Next I saturated Q-tips with brown oil paint and paint thinner and rub it through the cracks. Please let dry over night, I didn't do this so I have mucky shells because the oil wasn't properly dried, (I was in a hurry to show the samples).

  • 7. When it's dry you can either sand to get the top layer of oil off or rub it with turpentine. Don't use any water base or you well ruin the cracks. You should have brown cracks now. Next I'm going to use a lighter Tan color so my cracks don't stand out so much.

  • 8. Next I use an oil base varnish called "Clear Kote" , don't use water based!!! After that is dry then I put on my Flecto water based Varnish. Yes you can put water based Varnish over an oil Varnish and vice versa.

  • 9. Now you can do your art work but make sure if your water based products, protect it with an oil based (or your work well be all smeared. Now I sending pictures in separate messages and I'll explain each one.


  • ~1~This first picture is a piece of shell
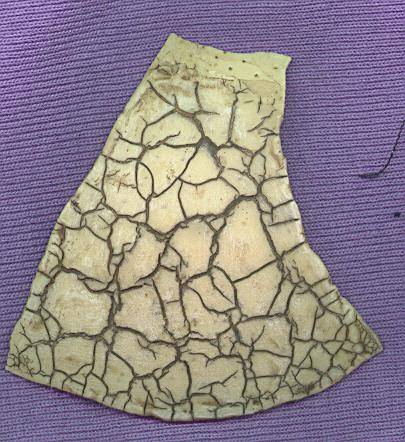
    before the oil based varnish was put on.
    ~2~This is same shell
    with the varnish and art work
    ~3~This picture shows how you
    can get the different crackling size
    ~4~ A kokopelli on a piece
    of ostrich shell


    INDEX