(The very basic instructions)
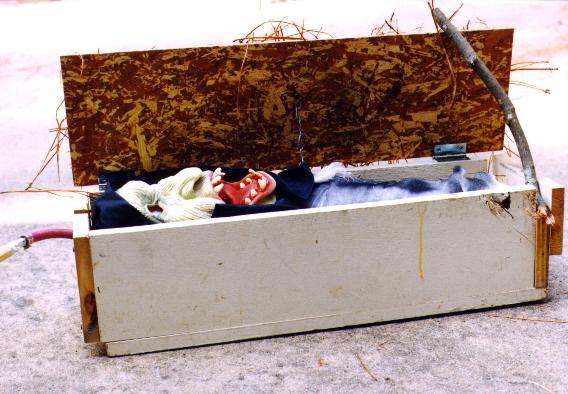
| Description: The Bob Popper Ghoul is a box about 8 inches wide, 20 inches long, and 8 inches deep. This box contains a hinged, camouflaged lid, is buried in the ground, and, under proper lighting, becomes invisible. When a TOT walks by, the Bob Popper Ghoul can be triggered, causing a head/mask/creature to suddenly pop up out of the ground. The grave popper, a.k.a. Bob Popper Ghoul, was developed in the summer of 1997. |


| This is essentially a spinn-off from the Grave
Jumper, developed by Doug Ferguson.
It uses the same pneumatic setup, but in a different layout to
accomplish a slightly different effect. Grave Jumper Instructions Grave Jumper, Image 1 Grave Jumper, Image 2 Grave Jumper, Image 3 These are stored on the Halloween-L Archives |
|
Safety: Use common sense. Pneumatics can be dangerous! I take no responsibility for the use or misuse of this information A good, strong travel-limiting chain should be employed in the event that the screen door closer or some other part of the device fails. Also, if a solenoid is used to control air flow, you must understand how to safely work with electricity. |

|
This is an image of the air setup involved. Pretty much everything can be found in the plumbing section of your local hardware store.
It requires about 60psi to work properly, but this makes it violent. Start off at 15 psi and work up from there until you find the lowest pressure that gives you desired results. Be aware.... |
| In this version, a manual valve triggers the Popper Ghoul. However, it is possible to use a hot/cold washing machine solenoid both to trigger the prop and to replace the bleeder valve, although I did not do this because of cost. It is HIGHLY recommended to use a soleniod becasue, with the solenoid, the activation time of the prop will go way down. Otherwise, there will be a two or three second delay and a loud HISSING sound before the ghoul flies up out of the box. |

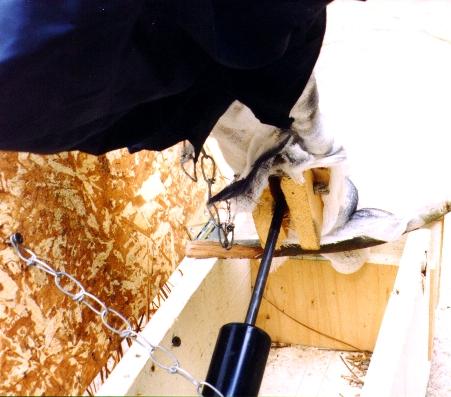
| Here is how the screen
door ram is attached to the wood throw arm. (The stick is there
to hold it open when the picture was taken.) Two triangular pieces of wood were screwed/glued onto the arm. A hole was drilled into each triangular piece. A bolt is placed through these two holes and the center of the throw of the air ram. |

|
For what it's worth, this prop didn't really scare many people. The hissing caused by the bleeder valve, which could have been eliminated with a washing machine hot/cold solenoid, gave the prop away. Plus, it wasn't that big of a thing popping out of the ground, either, so people didn't have much to react to. But, it's a good, basic, and kind of dangerous pneumatic prop to build |
