Rear seat addition...
#1
|
#2
|

#3
|
I went searching boneyards for a small SUV
or mini van rear seat. Though I actually had
a bench seat in mind, I stumbled across a '92
model Suzuki Sidekick that had these killer
little "fold-away" rear buckets. I'll briefly
detail the installation below, click on the
images for a larger picture.....
|
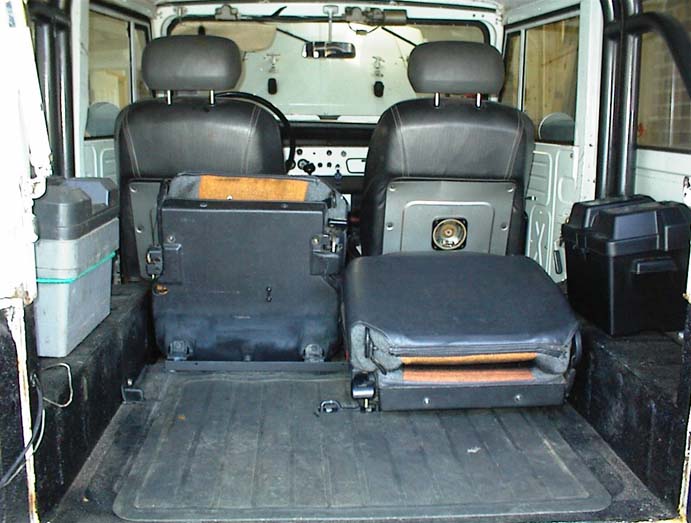
I made sure to get everything that was remotely related to the rear seats.
I got the hold down latches that the seats lock to when in the seat position,
these are noted by the red arrows in (Pic #1). I had to extensively modify the
center catch as it was recessed in the floor of the Suzuki. This meant cutting
the latch part off of the floor piece at the right height for use in the FJ40,
and making my own floor plate welding it to the latch and bolting the whole
assembly to the center of the floor. The outer latches were easy as they fit
nicely with a little shim welded to the bottom. There was already a cut-out in
the back of the side latches that almost matched up perfectly with the ribs on
the inside of the fender well of the Cruiser. I did have to grind it a little
to make it line up where I wanted it.
The front mounting points of the seats had two holes in each foot, a front and
a rear. This mount was also bent at about a 30 degree angle, I decided to make
this fit over the drop that transitions the bed of the tub to the floor directly
behind the front seats. Being that these feet were at a 30 degree bend and the
floorpan where they were going sloped at 45 degrees I had to make some 15 degree
shims and drill holes through for mounting. After that I thought I would be home
free, however, I later found that the rear hole in the outside front mounting feet
lined up squarely with the body mount bolts, which I dare not even try to remove.
My solution to this was to bolt the front parts of the mounting feet in, and work
a 1" x 1" piece of angle up under the rear part of the feet. Then I welded the rear
section of each foot to the angle, drilled holes through the tub and securely bolt-
ed the angle to the floor. This also, should serve as a stop to any small objects
rolling forward from the rear and under the seats. Yeah, like I meant to do that?!
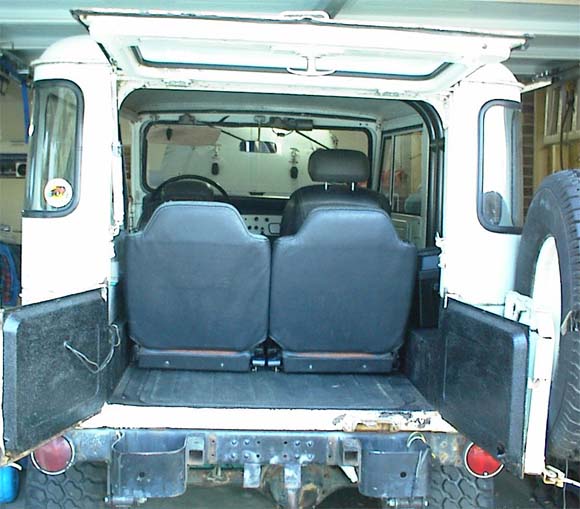
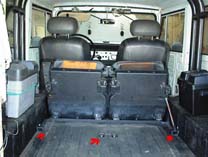
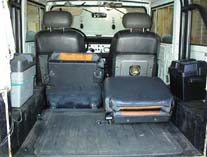
The other pictures show the different positions of the seats. I think it's a
real bonus to be able to fold just one seat up out of the way. That's nice when
your family is two adults, one child and a 30lb dawg. With both seats in the seat-
ing position, you're left with limited rear storage area, but you can still get a
set of golf clubs or a couple of long gun cases back there. With both seats folded
up and out of the way, you have almost all the rear floor space as you do with no
seats, you can see that in pic #1 also.
About the color, yeah I know, they have orange inserts. Well, two cans of spray
on upholstery dye later, and you can "hardly" tell they were orange/grey. I'll
have to report later on how well the dye wears, haven't had any test subjects...
uh, I mean passengers yet.
As I said I got everything I could from the rear of the donor vehicle, it even had
these little 3-point seat belts, which mounted to a tower that I plan to adapt to the
40 inner fender wells. That'll be page two of this section.......