'93-up 3rd gen RX-7 Engine Conversion Parts
Basic Versions of our FD/V8 Conversion Parts Now Available...
Designed with value in mind, these "econo" spec parts will help put a V8 powered FD within the reach of a guy on a budget.
CLICK HERE to find out more.
3rd gen RX-7 / LT-1 Installation Instructions On-Line...Step-by-step guide thru the LT-1 specific conversion process. Includes 3rd gen specific electrical modification details. CLICK HERE to find out more.
3rd gen RX-7 / LS1 Installation Instructions On-Line...Step-by-step guide thru the LS1 specific conversion process. Includes 3rd gen specific electrical modification details. CLICK HERE to find out more.
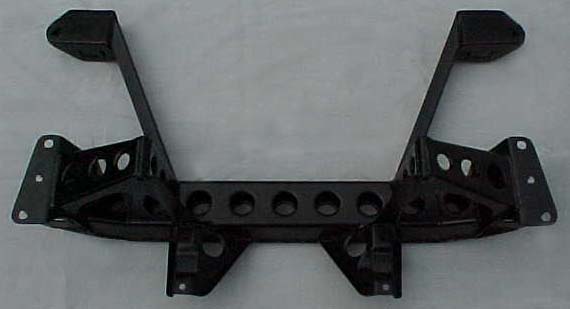
Granny's FD/V8 Subframe- Both lighter and better looking, our subframe retains ALL the stock lower control arm and steering rack mounting locations to retain the FD's original race car inspired suspension geometry. The lower control arm pivot areas are constructed from 12ga. (same as stock FD), while the remainder is made from 14ga. hot rolled mild steel. Finished weight of our subframe is actually less than the stock RX-7 unit. The production version is jig welded, and has all the eccentric stops and reference marks required for frontend alignment using stock hardware. Protection from the enviroment is provided by a nearly bulletproof satin black powdercoat finish.
Transmission Crossmember- Added to support the rear of the V-8 transmission when the rotary engine's "Power Plant Frame" is removed. The original FD design featured aluminum crossmember/struts that spanned across the bottom of the transmission/driveline tunnel. These struts helped box the bottom of the tunnel to add strength to the floor pan, but relying their thin sheet spot welded chassis attachment points to mount a V-8 transmission is a bad idea. They were never designed to carry the weight of a V-8 transmission, and adding stresses from the front of the V-8 torque arm would guarantee their failure. Our transmission crossmember is designed to spread these loads out thru 6 additional points in the FD's floor pan (for a total of 10 attachment points), distributing the added stresses thru a much larger/stronger area out by the FD's subframe connectors. The additional attachment points at the ends of the crossmember bolt to a 4"x6" back-up plate that is installed from the top side of the floor pan, sandwiching the RX-7 floor pan between. This design eliminates depending on the the spot welded connection of the RX-7's stock tie-strut mounting pads as a crossmember mounting point, which would result in the likely fatique cracking of your floor pan at the spot welds. Our lightweight crossmember is fabricated from sheet steel, and features flared lightening holes and a recessed area on the passenger side for large diameter exhaust pipe routing above the crossmember for maximum ground clearance. It features the same nearly bullet-proof satin black powdercoat finish that we use on our subframes.
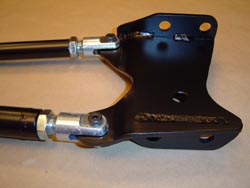
Torque Arm- This extreme duty "torque arm like" assembly (actually a front diff mount arm) was designed to handle in excess of 6250 ft/lbs of torque. The tubular construction features a much larger 1.25 diameter .095 wall DOM lower tube to withstand the tremendous compression loads seen during acceleration. Machined steel inserts reduce the tube's end diameter down for the threaded clevis style rod ends (pins placed in double shear) used in the rear and the urethane or spherical rod end used up front. The upper tube is a 1" diameter .188 wall DOM tube that is direct threaded, insuring that no tube welds are placed in direct tension under acceleration. Our long "torque arm like" design for the front diff mount reduces the surprisingly high differential "reaction force" to an amount that easily handled by the RX-7's stock chassis, as this load is further spread by our transmission crossmember's additional attachment points and fed into the chassis near the stock RX-7's chassis stiffening "subframe connectors". Protection from the enviroment is provided by a nearly bulletproof satin black powdercoat finish.
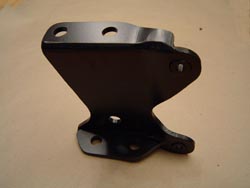
Differential Torque Arm Anchor Bracket- we designed this bracket for substantial abuse to match the capabilities of our extreme duty torque arm. All parts are made from formed .250" thick steel plate with (2) 3/4" DOM tubing inserts installed for attaching the torque arm clevise pins. It uses ALL 5 PPF mounting points on the RX-7 differential, tying all 5 points together for maximum strength. The bracket design places ALL the welds in shear along the weld axis for the ultimate in load bearing capability. Torque Arm mounting eyes are placed in-line with the differential mounting points, eliminating the bending or tearing stresses that are found in other designs. A generous radius between the torque arm mounting eyes helps distribute forces over the widest possible area.
Driveshaft- We sell both a steel AND an aluminum driveshaft for the FD/V-8 conversion. Both feature a much larger replacable front and rear u-joints, and bolt directly to the FD's stock rear pinion flange. While the aluminum shaft is generally perceived as being lighter and having less rotational inertia, in practice there is actually little difference. The aluminum shaft is made from larger diameter/thicker walled tubing, negating most performance advantages from using the lighter/more expensive material. We prefer the smaller diameter steel driveshaft as it leaves more room for larger diameter exhaust pipe routing.
3rd gen RX-7 / LT-1 Installation Instructions On-Line
Step-by-step guide thru the LT-1 specific conversion process.
Includes 3rd gen specific electrical modification details
3rd gen RX-7 / LS1 Installation Instructions On-Line
Step-by-step guide thru the LS1 specific conversion process.
Includes 3rd gen specific electrical modification details
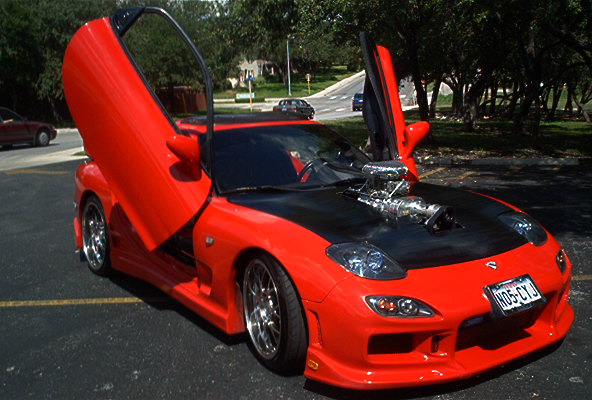
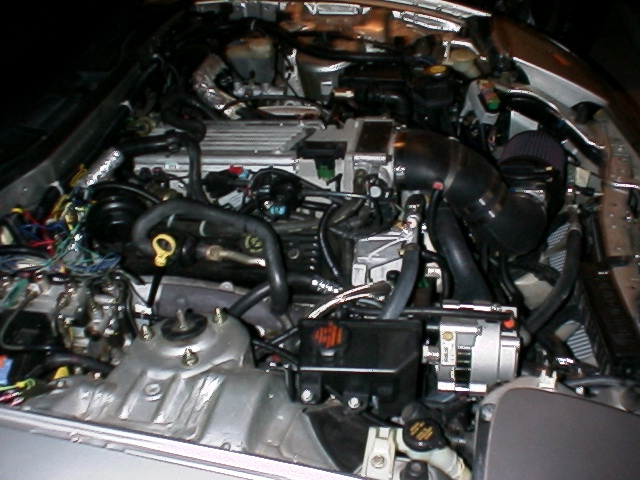
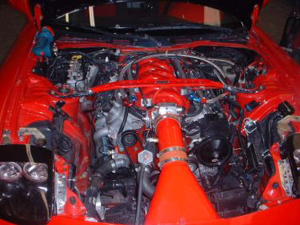
Customer Rosendo Dimas's Blown 3rd gen Project
To see more pics of this car, CLICK HERE
...Information Links...
Frequently Asked Questions...
Click above to find answers to questions such as...
...how much will all this V-8 stuff weigh down my car ?
...won't a V-8 have a higher center of gravity than a rotary ?
...can I use an LS1 ?
...can I use a regular Small Block Chevy ?
...can I use a Ford 5.0 or 4.6 modular ?
On-Line Instruction Manual
Performance update on Bill Hagen's LT1 powered '94 RX-7...
Bill took a trip to the strip, and came back with numbers for both performance and weight distribution. To check out the details and info, CLICK HERE. UPDATE... Bill reports that he has put over 15,000 miles on his RX-7 since the conversion. He says that it has proven to be an extremely reliable daily driver, with the only problem being a damaged power steering hose that was routed too close to the exhaust.
Ordering Information
...I see this is for the LT1. Do you offer parts to make it possible to use an LS1 ?...
...Yes, but it is not quite as easy. The LS1 powered 3rd gen on our site has had hood modification (cowl style hood). Although we sell the parts required, we do not promote the LS1 install as it requires modifying the hood in order to keep the stock steering rack location, which we feel is important. We have considered a few different ways to fit the LS1 under the stock RX-7 hood, but we feel they all have negative effects on the 3rd gen RX-7's near perfect steering geometry....
...lowering the rack induces bumpsteer.
...lowering the entire subframe lowers the front roll center.
...lowering the rack and outer ti-rod ends properly requires a narrower steering rack.
And last but not least...lowering the LS1 for stock hood clearance drastically reduces your ground clearance!!! Your cast aluminum oilpan will be the lowest point, and can be quite easily damaged if it bottoms out or is struck by road debris. For this reason alone, we prefer our "higher" engine location for the LS1, even for track cars! Think of it this way...If you install a LS1 (stock F-body pan) under the stock RX-7 hood, your car's ride height will be dictated by how brave you are regarding your oilpan's ground clearance. For a given oilpan/ground clearance, our "higher" engine location allows the rest of your entire chassis to sit 1-1/2" lower, resulting in a LOWER center-of-gravity overall when compared to the optional hood-clearing "lower" engine location. Think of our "higher" engine placement as lowering the rest of your car around the engine.
NOTE- the typical scheme used to REDUCE (does not eliminate) bump steer when lowering the rack for installing a LS1 into a 3rd gen RX-7 is to drop the outer ti-rod ends with an extended stud and race car style rod ends in place of the outer ti-rod end. We feel this set-up is less than optimal for a street car, as this type of rod end quickly develops slop as they wear, and do not have a pre-loaded design like the OEM ti-rod end to compensate. Another aspect to ponder is that some might consider the race car style rod end to be un-safe or even illegal to be used in this manner on a street car, as it's design allows a worn rod end to fall apart resulting in loss of control. The extended studs used to lower this type of rod end also induces an increased twisting force on the spindle's steering arm, which results in a car that is somewhat easier to knock out of steering alignment when introduced to curbs and potholes. While this type of set-up is common on race cars, even our own, we do not feel it is appropriate for the street. We doubt that any insurance company would knowingly cover a car used on public highways with such a mis-application of steering components.
Converting to a 2nd gen manual rack in your 3rd gen RX-7 allows a lower engine position and buys you some room at the hood, but it is not quite enough. The cast aluminum LS1 oil pan interferes with the rack clamping brackets for the 2nd gen rack. Modifying a used cast aluminum oil pan is very difficult, as the oil in the pores of the metal is near impossible to remove.
Just to be clear, our LS1/3rd gen conversion DOES NOT lower the engine/steering rack or require any bump steer correction. Because our LS1 mounting position DOES NOT require a lowered steering rack location, it DOES require hood modification for engine clearance in the area of the throttle body.
We use the same fabricated subframe for both the LT-1 and LS1 conversion, allowing an easy switch from one to the other without requiring purchase or replacement of a new subframe.
If you would like to install a generic Small Block Chevy into your 3rd gen RX-7, a distributorless ignition system will be required (Electromotive makes a good one) to avoid firewall modification. Point of referance: if you look down from above across the plane of the firewall, our Chevy V-8 engine location in the 3rd gen RX-7 centers the distributor hole with the edge of the lip on the firewall.
....so what if I want to convert my RX-7 to V-8 power too ?
You can contact us, by phone or e-mail, with any questions you might have about converting your car or placing your order.
 ...Click Here for Ordering Information...
 .....
.....
These are customer cars.
The LT-1 car owened by Bill Hagen, the LS1 car owned by Cecil Mora.