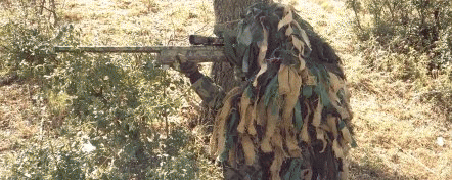

Step One:
Lay your base face down on the floor (the base is usually a pair
of old BDUs or a jump suit, mechanics coveralls are also good).
Before sewing anything on, some people decide to sew an internal
holster on the inside (for a backup firearm). You can also sew a
water supply onto the back with a small hose, this way you can
drink whenever you need to (something like a Camelbak). Just be
sure not to drink too much and have to go to the bathroom.
Lay some 2' netting on top of the base the way you want it sewn
on, leave the front side free of netting and don't put any below
the knees and elbows. Sew the outside squares onto the base, and
a few in the middle, just enough to make the netting somewhat
secure.
Step Two:
Cut some burlap (brown/green/grey, whatever colors you want to
use) into strips about 12-16" long. Tie one strip of burlap
to each section of netting, letting it hang freely on the other
end. Make sure you alternate the colors RANDOMLY, the purpose of
the suit is to disrupt the pattern of the human shape, you don't
want to replace it with another. You can also do this to a boonie
hat, or helmet. You can stop right here and your ghillie suit
should look like a pile of leaves, or you can go on.
Step Three:
Shred all the burlap strips by pulling out the horizontal strands
of burlap. You might want to do this outside, since it'll
probably get messy.
Step Four:
Sew some cavas on the arms, legs and chest to reinforce it. This
is necessary when you are crawling around a lot. The ghillie suit
is complete, but you can customize it however you want. I would
recommend adding local vegetation to the suit when you're using
it. A good idea is to go hide in the woods (or wherever you're
going to be using it) and have a friend try and find you. This
way you can fix up certain spots.
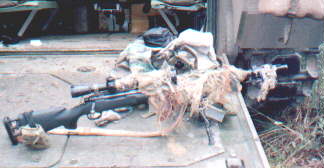
To camouflage your rifle, take
some extra netting, cover it with shredded burlap and drape it
over parts of the gun. 