| Interested in creating Selective Colored Photographs? Here is how to Create them. | |
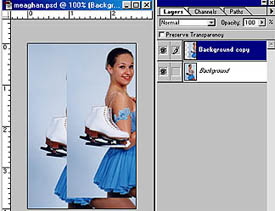 |
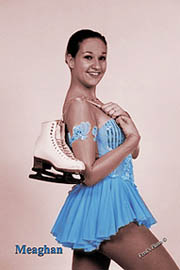
I once again used my favorite figure skaters, Meaghan. Start by making a duplicate layer. Grabbing the layer with the mouse and dragging it down to the duplicate icon and there you have it, an exact copy of the other layer. I have moved the top layer a little so that you can see the two layers. You will not need to this since as you duplicate the layer it places it directly on top of the other. It is important to have this registration of both images. |
 |
Next activate the copied layer and then, Under "Image - Adjust" go to Desaturate" or on the PC and maybe the Max use the keystroke "Shft + Ctrl + U". You will now have a good Black and White photograph. Next is where the fun comes in as you start to selectively erase the top layer. |
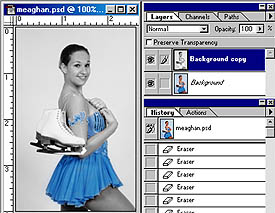 |
The next image shows the results. Use the eraser tool to selectively remove the top, Black & White layer. As you erase the top layer it will show the bottom or colored layer and there you have it, a selectively colored photograph.
|
 |
Just as an added bonus, you can also do the same with a Sepia toned photograph. Photographically Yours Fred Meulemeester |
All rights to this page reserved by Fred Meulemeester.