I had three fellow Jeepers come over to lend a hand (thanks Cory, Eric, and Paul).
First off I soaked every nut and bolt we would be removing for three days with WD-40.
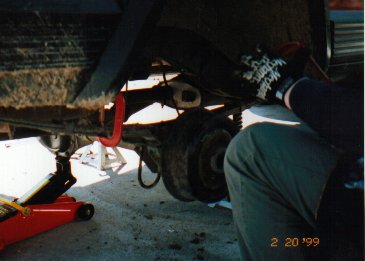
We placed C-clamps on the Leaf
pack and removed the u-bolts.

Then we lowered the axle with the jack
while the Jeep was supported with the jack stands. Then we removed
the center bolt which holds the leaf pack together. Next we loosened
the C-clamps and removed the leafs. I discarded the smallest leaf.
Rusty had suggested that if I didn't plan on towing I wouldn't
need the short spring. I saved it just incase. Next we cleaned of
the leafs using an old wire brush and a rag. Then we sprayed each
spring with a Lubracating spray. We reinstalled the leafs in the
following order, the longest stock leaf went against the main leaf,
then the Add-A-Leaf, then the remaining stock leafs from longest to
shortest. We used the C-clamps to pull the leaf pack together and
installed the new longer center bolt that came with the lift kit.
Then we raised the axle back up and reconnected it to the leafs with
the U-bolts. Then we cut the center bolt shorter with a hacksaw.
The center bolt is about 2 inches longer than necessary. Next we
installed the new shock and repeat everything on the otherside. Finally
we reinstalled the tires and lowered the rear back to the ground. The
initial lift was 4", by the next day it settled to 3 1/2" and to date it
has settled to 2.25".

I had gotten a lot of advice
on the XJ Forum, and many said I didn't need spring compressors nor did
I need to disconnect the Lower Control Arms (LCAs). So I went with that.
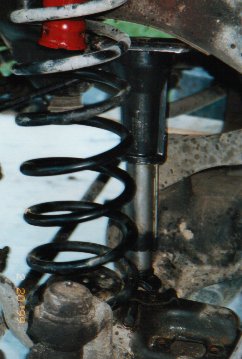
We removed the shocks, the spring retaining clip, the bumpstop, and disconnected the
anti-swaybar. Next we lowered the axle as much as we could. Well the
spring wouldn't just come out. We jacked up the other end of the axle
and with me standing on the brake disc of the end we were working on, one
of the guys was able to pry the spring out. We sprayed the new spacer with
lube and installed it.

Then we reinstalled the spring using the same technic
as when we removed it. Next we moved to the other side. Here we repeated the
same steps as the first side except with the new spacer and spring installed
already, we could not jack up the first side high enough to reinstall the spring
on the second side. Hind site being 20/20, I would use spring compressors.
Here's what we did. We took the stock bottle jack and placing it between the
axle and the uniframe framerail.
We spread it apart enough to get the spring
back in. You must watch your brake line because it will be close to fully
extended. Next we reinstalled the spring retaining clips (one striped and will
need to be tapped out), the new shocks, the bump stops, and reconnected the anti-swaybar. Then
we reinstalled the tires and lowered it down. With 1.75 inches in the front and
4 inches in the rear, it still looked like a hot rod.
Then
we reinstalled the tires and lowered it down. With 1.75 inches in the front and
4 inches in the rear, it still looked like a hot rod.
 (From left to right; Cory, me, and Eric, Paul didn't hang around long enough to get in the picture.)
Now with that done, it was time to test it out. So, we all went to a local area with some mud holes and gave it a workout. It did fine.