GENERAL TIPS: ELECTRICAL


 Paper caps
These are the most common ones to fail
after the electrolytics.(link to: One method of repair for lug base electrolytics.
These can be replaced with non-polarized disk in many cases.
If you wish to retain the original appearances,
here is how I do mine.
The pictures are thumbnails, just click on image for larger view.
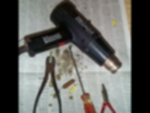
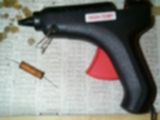
The basic tools are: 1-heat gun, 1-hot melt glue gun, 1-narrow screw driver,
2-longnose pliers, some paper to catch the wax,
and a glove that you can sacrifice to wax.
(In my case for the images, I have a side cutting wire cutter
and a half-round nosed plier)

THE WAX MAY GET
HOT ENOUGH TO
CAUSE BURNS!
PLEASE EXCERCISE
DUE CAUTIONS.
While holding the paper capacitor by one lead,
heat the opposite end carefully
until you see the wax start to melt.
Taking care not to scorch the paper tube.
Heat the paper barrel, until you have the wax on
the outside begining to melt.
When the melted wax stays liquid for a few seconds,
grasp the other lead with the other plier (or whichever tool
you have handy.
Often the end will pull out with just the plug of wax.
While the capacitor is still warm, grasp the barrel with the GLOVED
hand, and try to pull the tube off the remainder of the old
contents.
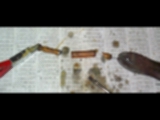
You will have an assortment of pieces like this:

If you happen to only pull out the other plug end,
heat the paper tube slightly, preferably not in gloved hand, but on
a heat resistant surface.
When the wax is again molten, pick up the paper tube
with the gloved hand again, and gently push
the remaining contents out with the narrow bladed
screwdriver.
The replacement must fit inside, and be of correct values.
Also make sure that if your replacement is ploarized,
the negative lead marking must go on the side marked-
"outside foil".
In my example, I am using a "non-polarized" (NPO) mylar type.
If there is a need to solder longer leads, make the connection
close to the replacement such that the new plug ends hide them.

If the tube diameter is greater than the replacement,
that space can be filled with hot-melt glue.
You may wish to hold the tube with the gloved hand,
as most hot melt glue sticks melt at a higher temperature than the wax

When gluing the "plug ends", take care to fill voids,
and smooth the surface.
The dark sticks work better, but if clear sticks are all that is available,
the glue can be "fogged", by tapping the setting glue with your finger tip.
Again taking care not to burn yourself,
The glue will remain soft through a large temperature range,
so you need to let it get cool enough to "fog".
The length of time will be dependant on the amount of glue in the plug,
as well as the amount of filler that may have been needed for
tubes notably larger than the replacement.
Brown candle wax can also used for plug ends,
but is not quite as easy to work with as it is more fluid than hot-melt glue.

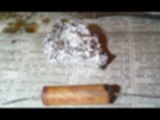
The final product.
The foil in the background was used scrubbing the paper tube
prior to the final assembly.
The tube was heated, and while the wax was still soft, the wadded
foil cleaned off much of the accumulated grime.
One burn mark had been there, possibly at the time of it's
installation when this cap was used as an
original equipment replacement.
Some have used a household oven set at 200 degrees for a few minutes
to clean the centers out, and often accumulated dirt on the outside comes off too.
Drawback is when you are reassembling the radio-
Will you remember where each was connected and polorization?
There will always be the chance for error, this can add to that
possibility.
Elelctrolytics:
Threaded Base
PENDING
Electrolytics:
Twist Lug Base
PENDING
 I
have permission to use the image that comprises this background,
This
grille cloth can be purchsed through the link below.


