|
Lesson 6: Word Processing Rules
.........(10 marks)
1. Open a new WORD document:
...a) Point at the File command in the menu bar.
...b) With the mouse button down, select New Blank Document.
2. Save as "Lesson 6 - WP Rules" to your ICT files directory
3. Insert a Header and Footer into your document:
...a) Select the View menu and the Header and Footer option.
...b) Place the insert cursor in the Header section. Using the Formatting Palette, select the Left Justify command.
...c) Type in the lesson number of this assignment.
...d) Place the insert in the Footer section. Using the Formatting Palette, select the Right Justify Command
...e) Type in your "name", select OK.
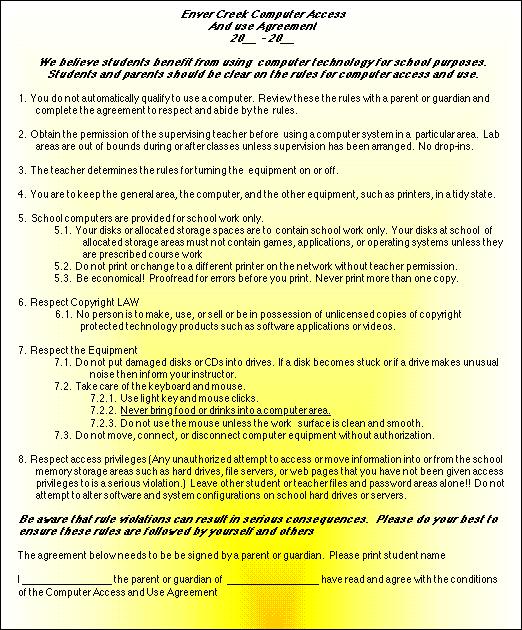
3. Do simple keyboarding to enter text. The text is shown above. Type one space between words and after punctuation. Start
all paragraphs and items such as headings and lists on the far left, let word wrap take place, use returns only at the end
of paragraphs and at the end of listed items that are clearly separate points or titles. Proof read for spacing mistakes between
words and obvious spelling mistakes.
4. Do a spell check using spelling command from the Tools menu or the Tool bar. From the Tools menu select Spelling and
Grammar.
5. Make all appropriate style changes (bold, underlines, italicize, etc.)
6. Set ALL document margins to .5 in.
...a) From the Format menu select Document
...b) Change ALL margins to .5", select OK
7. Change document to LANDSCAPE orientation
...a) From the File menu select Page setup
...b) Change your orientation to Landscape (sideways) by selecting the icon that represents a person on their side.
8. JUSTIFY the document text
From the Formatting Palette, Document option change all of the margins to .5 inches. NOTE – Word will show
an dialogue box that asks for clarification of the margin settings. IGNORE this warning.
9. Create 2 Columns
Columns can be created from 2 areas.
...a) From the Format menu select COLUMNS and them the 2 column option …...OR
...b) From the Toolbar icons, select the columns option and drag the mouse over two columns.
10. This would be a good time to SAVE your document. As you have already saved your document once, the Save function will
automatically save your document to your disk with all of the changes you have made.
11. Creating borders for your document
...a) Highlight the text in the first column.
...b) From the Format menu select the Borders and Shading option.
...c) Select the “Box” style and an appropriate line design and colour
...d) Highlight the text in the second column.
...e) From the Formatting Palette select the Tables and Borders option.
...f) Select the “Box” style and an appropriate line design and colour
12. Adding a graphic.
...a) It is your decision where you want to put a graphic, beginning or end or even somewhere in the middle. Because
you have already put a border around your document, it may be easiest to put it at the end.
...b) Using google.ca/images, select n appropriate graphic for your document. Remember to resize your image to fit in
the column and also make it a centered graphic.
13. SAVE your document.
14. ** E-MAIL YOUR "COMPUTER RULES" DOCUMENT FOR GRADING
Once you feel confident that you have completed this lesson, e-mail your document as an attachment to your instructor.
For Enver Creek students use the following address:
aujla_m@sd36.bc.ca
Your document should include the appropriate file extension in order for the formatting to remain in transmission.
For sending documents from WORD, use the extension ".doc". A correct file name and extension would look similar
to:
L6computerrules.doc
Notice that any spaces in the file name have been removed and an indicator of which lesson (L6) has been added.
The assigned value for this assignment will be returned once it has been graded.
|