"How to Add a Texture or Tiled Image to a Left Scrolling Stationery "
"Using Outlook Express"
I would print this for ready reference
In this Tutorial, you will need to download the below
Exe, or Zip File to have your script to change.
(Click on above)
For different backgrounds to use for your background, just about every
Web Site you visit will have a background that you might like to use.
Just right click on the background, and hit "Save Background As".
Then save it to your folder after giving it a name.
~~~~~~~~~~~~~~~~~~~~~~~~~~~~~~~~~
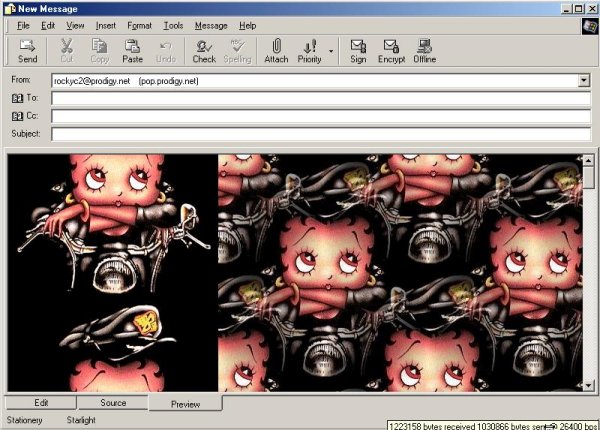
For this I used the below image

For the Seamless Background, I took the Image to 20/20
and got this. You should make the background lighter, but I didn't do it
for this tutorial.

~~~~~~~~~~~~~~~~~~~~~~~~~~~~~~~~~~
Remember that in this tutorial you will have a gif for an animated image,
and a jpg for your background.
Also remember to save everything to
C:\Program Files\Common Files\Microsoft Shared\Stationery
~~~~~~~~~~~~~~~~~~~~~~~~~~~~~~~~
Here is the script you will be using.
In this script, you don't have to worry about the size of your Image
But for the Text Margin, you will have to know the width of your left scrolling Image. That's where 20/20 will get you the size.
Everything in red is what you will be changing
~~~~~~~~~~~~~~~~~~~~~~~~~~~~~~~~~
<!DOCTYPE HTML PUBLIC "-//W3C//DTD HTML 4.0 Transitional//EN">
<HTML><HEAD>
<META http-equiv=Content-Type content="text/html; charset=windows-1252"><BASE
href=file://C:\PROGRA~1\COMMON~1\MICROS~1\Stationery\>
<STYLE>BODY {
FONT-WEIGHT: bold; FONT-SIZE: 14pt; MARGIN-LEFT: 300px; COLOR: #ffff00; FONT-FAMILY: "Arial"; BACKGROUND-COLOR: #000000
}
</STYLE>
<META content="MSHTML 5.50.4207.2601" name=GENERATOR></HEAD>
<BODY bgColor=#b8b8b8 background=cid:003401c1db0e$3b72f820$4a8dfe3f@oemcomputer>
Take out the above that's in red and replace it with the below line changing the name of the Image
"C:\Program Files\Common Files\Microsoft Shared\Stationery\awesomebiker2.jpg"
<DIV><FONT color=#800000 size=4></FONT><BR></DIV>
<DIV> </DIV>
<DIV> </DIV>
<DIV><BR></DIV>
<DIV style="FONT: 14pt arial"> </DIV>
<DIV><BR></DIV><BGSOUND balance=0
src="cid:003501c1db0e$3b72f820$4a8dfe3f@oemcomputer" volume=-200 loop=infinite>
Take out the above that's in red and replace it with the below line changing the name of the Midi
C:\Program Files\Common Files\Microsoft Shared\Stationery\aria.mid
<DIV id=imageholder
style="DISPLAY: none; Z-INDEX: -1; LEFT: 0px; POSITION: absolute; TOP: 10px"><IMG
id=tempImage style="DISPLAY: none"
src="cid:003301c1db0e$3b72f820$4a8dfe3f@oemcomputer">
Take out the above that's in red and replace it with the below line changing the name of the Image
C:\Program Files\Common Files\Microsoft Shared\Stationery\awesomebiker1.gif
Remember: If your image is animated, leave it as .gif
If it is a still Image, change .gif to .jpg
<SCRIPT language=VBScript>
dim x
x=0
y=0
for w=0 to 9
document.write "<img id=pics"&w&" src><br>"
next
imageholder.style.display="block"
pics0.src=tempImage.src
pics1.src=tempImage.src
pics2.src=tempImage.src
pics3.src=tempImage.src
pics4.src=tempImage.src
pics5.src=tempImage.src
pics6.src=tempImage.src
pics7.src=tempImage.src
pics8.src=tempImage.src
pics9.src=tempImage.src
sub scroll()
if y=1 then
exit sub
end if
if x < pics0.height then
setTimeout "move", 1
else
x=0
setTimeout "move", 1
end if
end sub
sub move()
imageholder.style.top=-x
x=x+1
setTimeout "scroll", 1
end sub
sub imageholder_()
if y=0 then
y=1
elseif y=1 then
y=0
end if
scroll()
end sub
scroll()
</SCRIPT>
<SCRIPT language=JavaScript>
<!--
ScrollSpeed = 100; // milliseconds between scrolls
ScrollChars = 1; // chars scrolled per time period
function SetupTicker() {
// add space to the left of the message
msg = " Starlight Stationery";
Change Starlight Stationery to anything you want.
RunTicker();}
function RunTicker() {
window.setTimeout('RunTicker()',ScrollSpeed);
window.status = msg;
msg = msg.substring(ScrollChars) + msg.substring(0,ScrollChars);}
SetupTicker();
<!-- end -->
</SCRIPT>
</DIV>
<DIV> </DIV></BODY></HTML>
~~~~~~~~~~~~~~~~~~~~~~~~~~~~~~~~~~~~~~~~~~~~
Now that you have made all your changes,
it is time to "Save As" your Eml File.
Go to this page to learn how
This is what this one looked like
