This page will give you a basic guide on how to dissassemble your 7600 / 7500a
You will need;
- A metal flathead screw-driver (if you intend to remove the cpu)
- A plastic flathead screw-driver (if you intend to remove the cpu)
- A crosshead screw-driver
- Some adhesive thermal paste (if you intend to remove/replace the cpu and/or cooler)
- A replacement cpu (if you intend to replace the cpu)
- A replacement cooler (if you intend to replace the cpu and/or cooler) {you can use the original cooler}
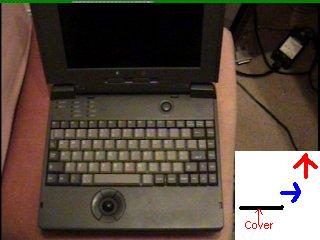
1. open the laptop, there is a small cover above the keyboard with the status lights on it. It two clips holding
it in, remove it by pulling back on the clips and lifting it then pushing it towards the display. (see fig-1)
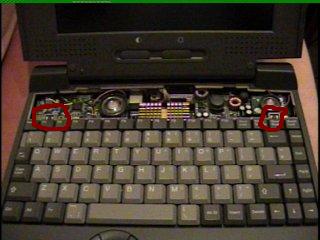
2. remove the two keyboard screws (on the left and right) and remove the keyboard by lifting it slightly and pushing
it towards the display. unplug its two "flexi" connectors from the left side of the machine. (see fig-2)
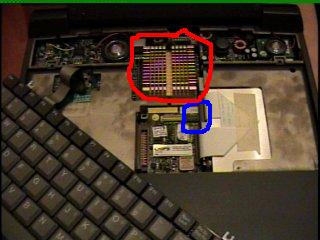
3. you should see a large black block with a cooling fan on it. this is the cpu cooler and the cpu is under it. the dip
switches are just below this block on the right hand side. (see fig-3)
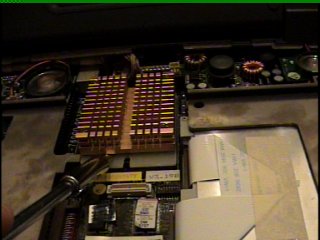
4. to remove the cpu cooler use a flathead screw-drive to lift it off. to do this carefully insert the screw-driver into
the grove between the bottom of the cooler and the cpu socket and twist VERY carefully (see fig-4) repeat for all
of the sides until the cooler comes off.
5. to remove the cpu use a plastic flathead screw-driver and do the same thing that you did to remove the cooler
6. insert the replacement cpu into it's socket.
7. install the cooler you have chosen onto the cpu
8. do not reassemble untill you have set the dip switches
9. once you have set everything up the reassemble and you done!