Editing of stereoscopic photos - the finishing touch
If you decide, to publish your stereo pairs on the Internet, in print or any other manner, you should take some time to edit the images. This way you get the most out of it.
If you're using a normal
photocamera (not a digital), it begins with the scanning process.
I find it easiest, to scan the images separately.
When you got your pictures on the screen, check if they're
parallel. With freehand photographing, one (or both) pictures
might show a slope of the verticals. If your graphics editor
supports precise rotation of the image, use it. Both images
should be exactly parallel.
The most important and joy-boosting editing technique is something, that Tony Bignell (new window) explained to me:
Mounting to the window
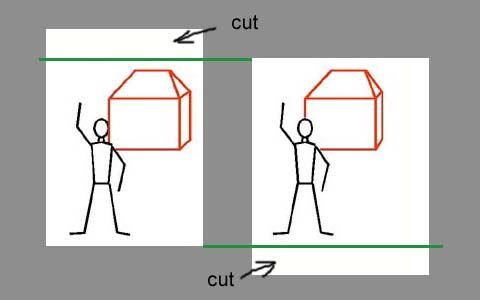
Put the images side by side in a way, that a common point on both pictures shares a horizontal line on your monitor. Then clip (or crop) away the parts, that extend beyond the upper and lower edge of the other image:
Then, put the images on top of each other, so that a common point in front of the picture lies on the same vertical line. Now cut away the extending parts to the left and right:
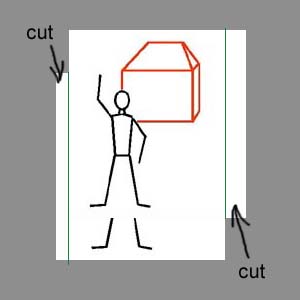
Now you have a 3D-set that lies neatly in a window, well behind the level of the screen. You can even experiment with it, selecting the point to align the two images further behind. Entities in front of that point will then stick through the window! (I have done this with the first image of the puppet series, where the raised hand sticks through)
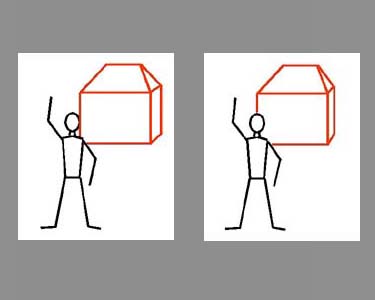
The result of the
clipping action (crosseye view only). Notice, how the man stands
well inside the white window.
No navigation bars on the left side? Please click here.