|
Baby Land Turtles (Baby Box Turtles) 
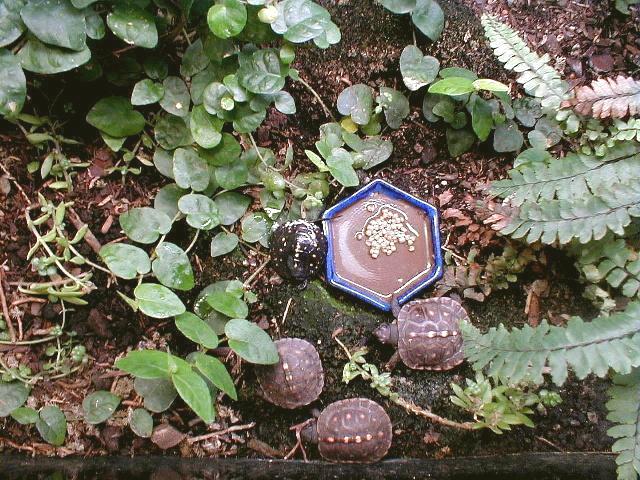
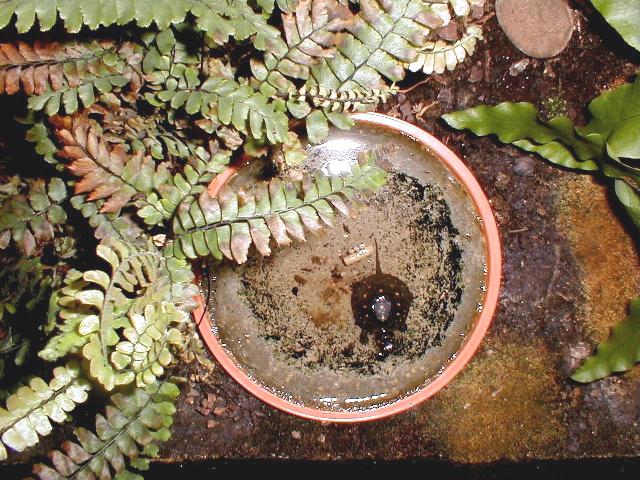
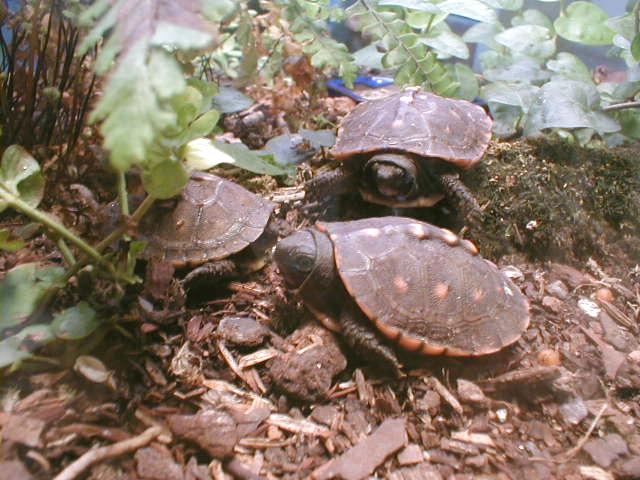
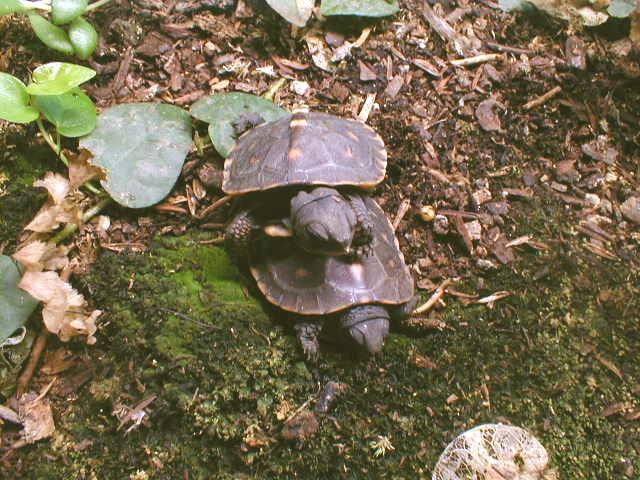
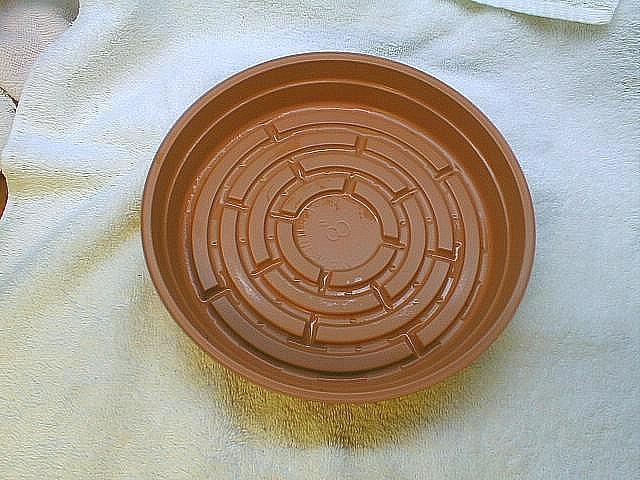
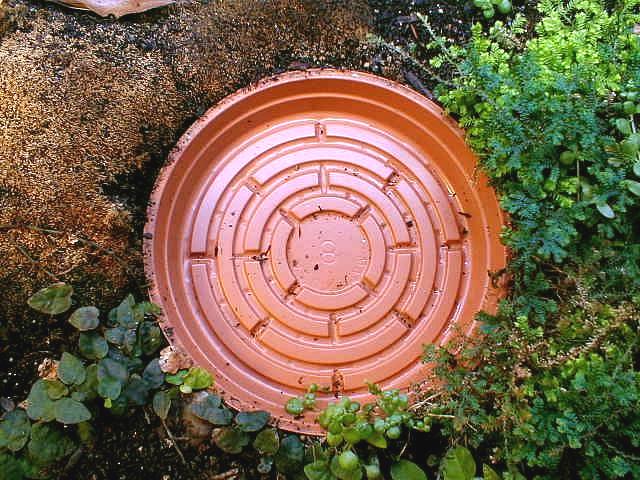
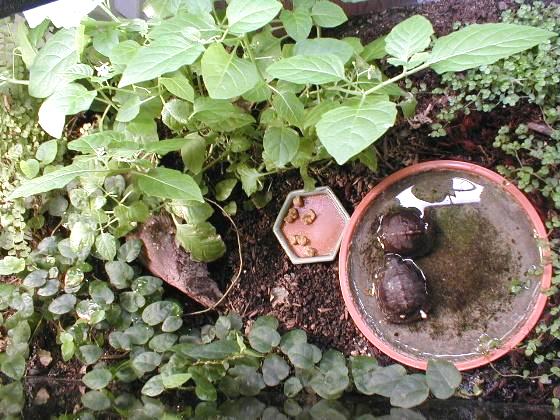
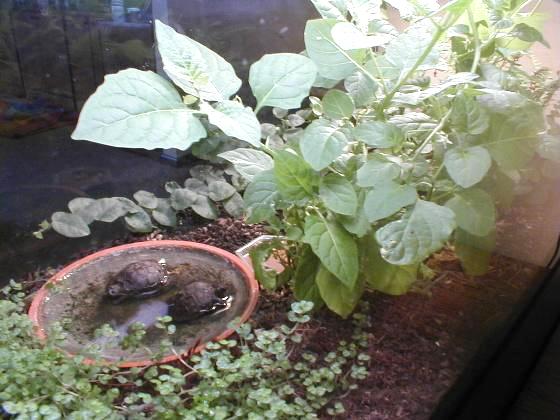
Our baby terrestrial turtles like George, W, Bush, and Laura spend their first year or two in a 20L gallon aquarium planted as a vivarium. These are box turtles and spotted turtles who inhabit the eastern part of the United States where rain is frequent and the soil is usually damp to wet. Some baby water turtles may temporarily spend time in it too provided they are small enough to eat in the water bowl like W did. The bottom is filled with two to three inches of potting soil preferably potting soil that does not contain perlite. No drainage gravel is used. It is planted with mosses, small house plants, and small plants from the yard or woods. Just about any low light small house plant will do provided it is not planted in a soil mix containing styrofoam beads. We don't like the look of white perlite and styrofoam beads in the vivarium and we don't want the turtles ingesting them. Styrofoam beads also stick to damp turtles. Each fall we gather fresh hardy moss to replace any moss still remaining in the vivarium. Hardy mosses like it cold and will not grow in our vivariums but will last for many months. We tried tropical moss we purchased over the internet which is supposedly better than hardy moss in vivariums. It did not grow for us either probably because our vivarium was not warm enough. New plants are added as needed. | pic 1 | pic 2 | pic 3 | pic 4 | pic 5 | pic 6 | pic 7 | pic 8 | pic 9 | pic 10 | pic 11 | pic 12 | Yes baby turtles like to dig and sometimes disappear from sight, especially baby gulf coast box turtles like Laura. Baby water turtles are just as likely to bury themselves if given the opportunity. The plants provide natural cover which lessens the digging, but digging is normal. In the wild, baby turtles on land would be underground or under cover almost all the time. So we give them a natural environment we enjoy creating. The soil has several advantages. The soft soil allows baby turtle claws to develop naturally. Secondly baby box turtles have very offensive urine which the soil absorbs eliminating the odor. These baby turtles also require high humidity which is provided by the soil, plants, and leaf litters. Growing plants in the vivarium requires watering and misting which is an excellent way to judge how much moisture to provide for the turtles. For many years we used a florescent aquarium light with a plant growing bulb. Due to the location of this vivarium, the light is turned on and off manually. We are often asked about providing UV light. Baby turtles like box turtles are very rarely encountered in the wild even by experienced researchers because they live their first few years under cover. They also overheat quickly in hot sun. So it stands to reason that baby land turtles do not get much UV light in the wild their first few years. When the weather is warm enough we like to put our babies outside in a wire covered container for some sunshine not in full sun but in a location partially shaded by vegetation. This is where they get their UV. If they are large enough, they will spend the summer in our Tour 9 - Summer Box for Juvenile Box Turtles Outdoors. Clean water is provided every day. We use water bowls of our own making to provide stable shallow non slip bowls that are completely safe for baby turtles to enter and exit. They are also easy to remove for cleaning. To make a bowl and a permanent depression in the soil, we use two plastic flower pot saucers. The first saucer is cemented to the bottom of the aquarium with aquarium sealant. This provides a permanent depression in the soil for the water bowl. It takes an aquarium sealant to stand up to the constant moisture without softening while still being easily removed with a razor blade when desired. The water bowl is made by filling the second saucer with cement (the kind used to make sidewalks). We use sand mix. The wet cement will slump. As it sets, it can be worked back to the rim of the saucer. After the cement is dry, the dish is soaked in a bucket of water for a week to season the concrete. Then the bowl is scrubbed with a stiff brush and water. This makes a nice heavy bowl that drops into the first saucer. We use a 6" bowl for the 20L aquarium. See how to make these water bowls in Tour 12 - Many Uses for Concrete. After the turtles are one year old, they may be moved to a larger vivarium. Here we use an 8" water bowl. However, the turtles are now larger and need a little deeper water. We again use two plastic flower pot drainage saucers. The first one is again cemented to the bottom of the aquarium to create the depression. The second saucer is used as is without being filled with concrete. It is better to place the water bowls far enough from the sides of the vivariums to allow the turtles to pass without walking through the water even though they will anyway. This allows the water to stay cleaner longer. It is amazing how much soil a small turtle can drag into a water bowl in a days time. The light for the larger vivarium is on a timer. The light is set to turn on after normal daylight is reached because the turtles begin stirring in the early morning light. We give them the early low light hours they like. The timer is set to go off after dark at a time convenient for us. For both vivariums, food is placed on small ceramic dishes that are again drainage saucers for small flower pots. Flat candle holder dishes are also good food dishes. Food is also placed in the water bowls since they are cleaned daily. W needed to eat in the water and most box turtles also like eating (and pooping) in the water. The plants are fun to grow. However, the turtles can be hard on them especially our favorite plants. They are easily replaced if they die, get too big, or are trampled. Baby turtles do not eat the plants so that is not a problem. Some smooth stones may be used to decorate. We only place stones flush with the soil so they are not obstructions. Tree leaves in autumn also add a nice seasonal touch. If bugs begin to infest the vivarium, they are easily controlled by watering them with a strong chlorine bleach solution. We use about a half oz of bleach in about 8 oz of water. The bleach solution will kill most bugs and worms without harming the plants. We take care not to get it on the turtles. The chlorine will quickly evaporate and does not leave a harmful residue. As you can see we place different species of turtles together and they get along just fine. Size is more critical. We keep turtles less than one year old separated from the larger turtles. Their legs and tails are too small to tolerate a nip from a larger turtle. If we were raising baby turtles or tortoises common to arid areas, we would set up a vivarium with soil and plants similar to their natural environments. Few turtles live in totally dry environments even though many people place them in totally dry conditions like washed sand. Using and caring for appropriate plants is a good method for providing suitable humidity. For such environments we caution against using sand which sticks to damp turtles and is tracked into water bowls. You do not want to be washing sand into your plumbing drains daily. Use a potting soil appropriate for your plants. Perhaps the greatest advantage to the vivarium is cleaning. Basically we do not clean the vivarium like we would if we had the turtles on newspapers or a dry substrate. Scraps of food that fall off the food dish are picked up because they get moldy but this is not a daily event. Wear and tear takes its toll on plants and they may grow too large for the space so caring for the plants is most of the routine maintenance. The glass gets dirty along the bottom from the turtles. Misting and watering also spots the glass. Cleaning the glass is no worse than any other aquarium. A vivarium can last for many years with minimal care. We often redo our vivarium completely in preparation for the arrival of new babies. This is done by choice not necessity. It is part of the fun of creating environments for the turtles. In the summer of 2004, we replanted our 20L vivarium in preparation for two new baby box turtles. We decided to try another experiment using garden compost we made complete with many bugs in it. We screened the compost first through a half inch screen and them through a quarter inch screen. The earthworms were picked out and fed to our turtles. Most visible bugs were lost in the process, but we knew there would be many very small bugs left in the compost that would be noticeable in the vivarium. We wanted to see if this would be a good food source for the baby turtles. Also expected were some weeds. The bugs did not prove to be valuable as food. They were mostly visible under the food dish. The turtles were never seen eating them and the bugs were never a problem. Most were eradicated with a chorine bleach solution. Some weeds sprouted but not as many as expected. We have tried many plants (weeds) from our yard in our vivariums with only minor successes. This time we had one notable success. We had a vibrant growing common nightshade plant that produced tiny white flowers followed by small black berries. It was pruned to stay within the vivarium. Hardy moss planted in the vivarium did not survive, but baby tears, creeping fig vine, and ferns did very well. In fact the compost proved to be better than any potting soil we have used. Our larger vivarium was looking pretty tired at that time and we replanted it the next time we had compost ready (we maintain a compost pile) later that year. If the water bowl is lower than the surrounding soil in the vivarium, water may run into the water bowl when the plants are watered. The bowl can be raised by gluing the saucer used to make the depression onto something heavy and waterproof instead of the bottom of the aquarium. We used a piece of plastic decking and hot melt glue. This raised the bowl one inch above the bottom of the aquarium. Old plastic cutting boards also work well for this purpose. | pic 25 | In Tour 13 Using Brass and Copper we show how to make hanging planters for aquariums. We empty our aquariums during summers because we like to put our water turtles outside. So we hung a hanging planter in our 20L vivarium for the summer. It worked out so well that we left it there after the turtles destroyed all the baby tears that were planted in the vivarium. | pic 26 |
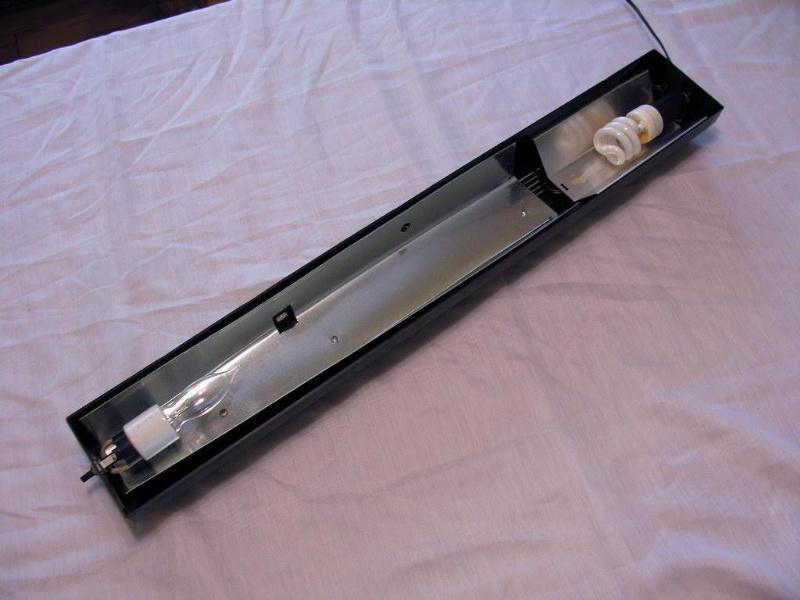
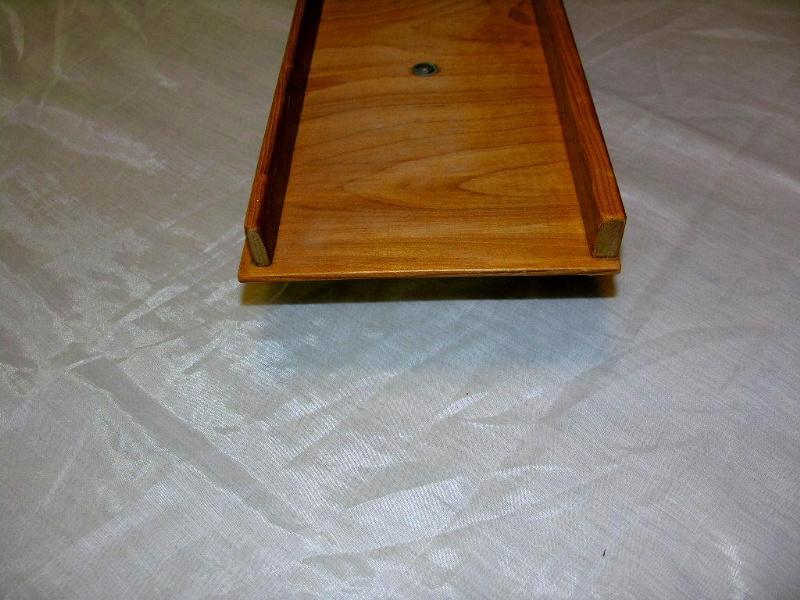
More on lighting and heating We originally wrote: "The top of the vivarium is open for good ventilation. No source of heat such as a lamp or hot rock is provided. We have tried hot rocks and heat lamps and have concluded they do more harm than good because they dry out the vivarium and turtles. Winter heating dries out the house and vivarium fast enough. So they are maintained at normal room temperature between 70 and 75 degrees F. Daily misting and watering of the plants are usually required during the heating season."After many years of use our florescent aquarium light died. Rather than simply replacing it, we decided to experiment by stripping out the florescent light apparatus and installing an incandescent bulb socket at on end. In it we installed a compact florescent bulb with more light output. Of course the light was stronger on one side of the vivarium than the other side and it did not give off much heat. Then we added a second screw in socket on the other end in which we installed a low wattage flame shaped decorative incandescent bulb. This gave us better lighting but did not change the temperature at the bottom of the vivarium. Aquarium strip lights are readily available in this configuration. We have had some problems with baby box turtles not eating in the vivarium after being outside all summer so we wanted to try raising the temperature in the vivarium without using high wattage lamps to do it so we decided to try making a cover to close off the top of the vivarium. Our first cover was made from scraps of fiber board. It worked very well but soon warped so a second cover was made out of scraps of plywood paneling and wood which was sealed with polyurethane. With this cover and the lighting just described, we can raise the temperature in the vivarium to 85 degrees while holding in the moisture (and fogging up the glass). This cover can be set at several positions to allow some venting thus allowing us to regulate the temperature and moisture inside. In summer the cover is not used. With our new warmer arrangement the baby box turtles have a much better appetite. The first new hatchlings raised in it over one winter grew much larger than any baby box turtles we raised before. What a difference! We strongly recommend using a cover to hold in heat and moisture if you have baby box turtles not eating as well as you would like them to. Our homemade cover has several advantages over plastic aquarium covers. First we have the satisfaction that we made it. Secondly it has a much larger opening when removed which is necessary for removing the water bowl for cleaning. Thirdly the strip light we use has no glass between the lamps and the vivarium to reduce the light and heat to the vivarium. And lastly it is easy to remove it completely in summer when it is not needed. If you would like to make a similar aquarium cover and you are not equipped to make one out of wood, you can achieve the same results with something as simple as a piece of styrofoam, foam poster board, a piece of plastic, a wood board, or even a piece of cardboard covered with aluminum foil. First concern yourself with achieving the results you want; you can address the appearance of the cover later. Have fun experimenting. Our warmer vivarium
proved just the answer when we adopted our first exotic turtle, a small
Asian box turtle named Houdini who really likes it warm and steamy. We
will tell Houdini's story another time.
There are more techniques
covered in other tours. While we are constantly experimenting and learning,
we have concluded that a vivarium environment is a great way to house terrestrial
turtles of all sizes indoors.
We hope you enjoyed our
first behind-the-scenes tour. Come back again.
|