|
Using Brass and Copper
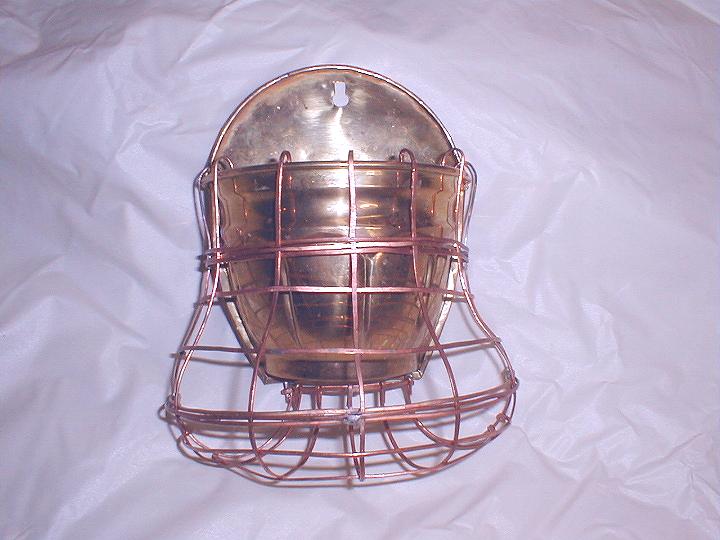
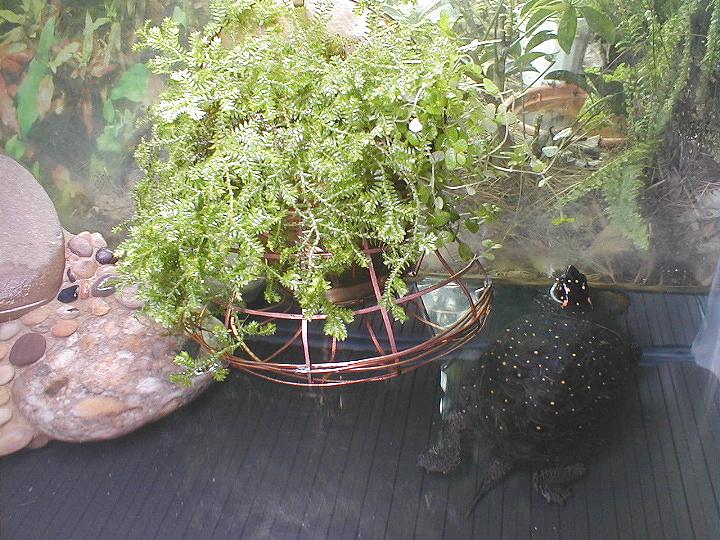
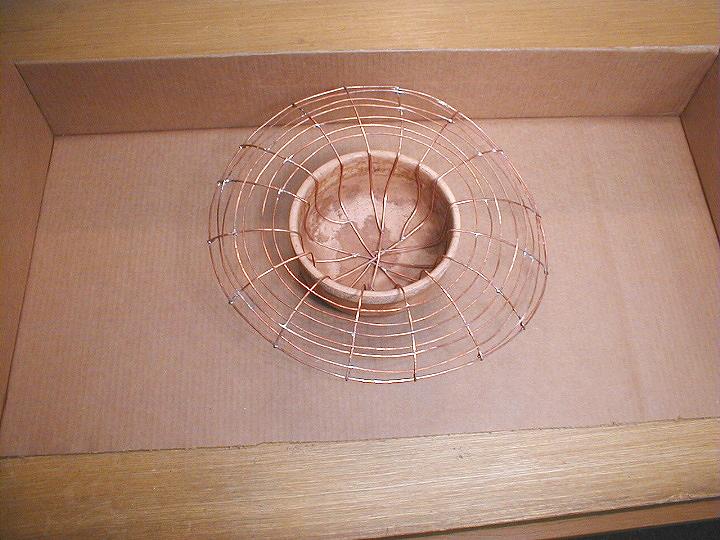
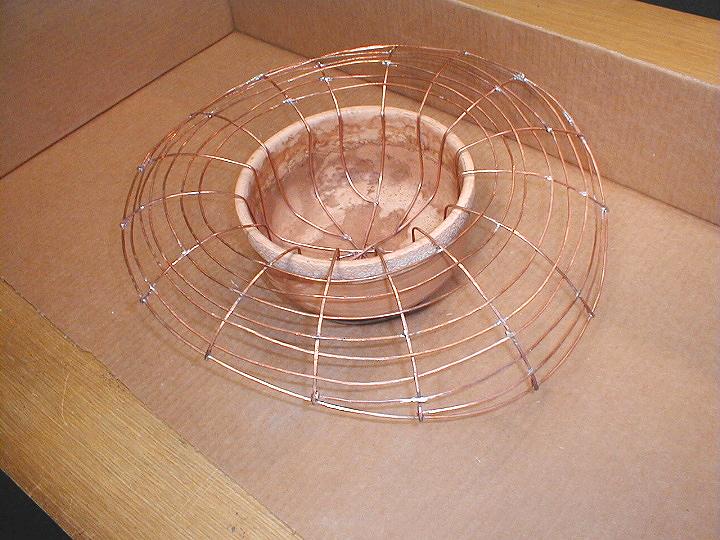
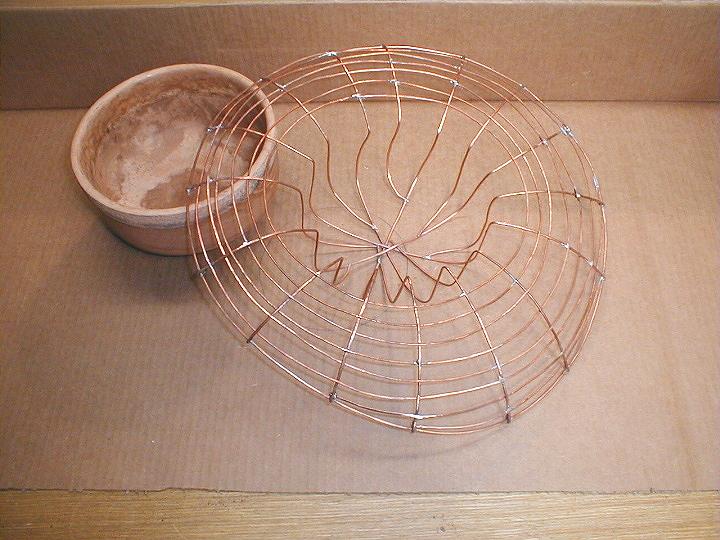
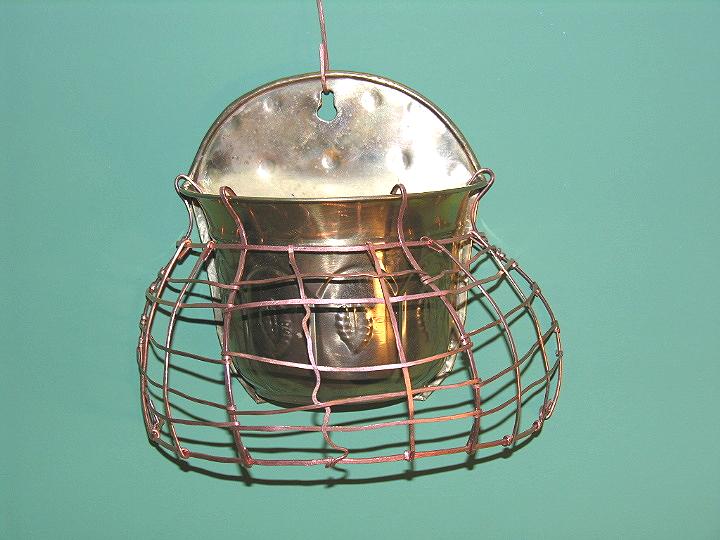
We enjoy inventing new ways to build environments for our turtles. This time the challenge was to utilize more of our aquarium while only using several inches of water. We wanted to add lots of plants and utilize more of the volume of the aquarium without filling the aquarium with water, rocks, and concrete structures. And we wanted to use a material that like concrete is very versatile, durable, inexpensive, and easy enough for anyone to work with. We wanted to try brass and copper. Why brass and copper? Remember we use copper pennies in your aquariums to prevent the growth of algae. Copper is the active ingredient in most algaecides. This is important as we make the environment more complicated and harder to clean. We also wanted a material and method we can easily start, put down for a time, stop, add to, and alter as needed. And along the way we had some luck that spurred us on. We started by making a cardboard model of our aquarium - the bottom and three partial sides. | pic 1 | Our first try was to take an inexpensive brass bucket for a planter. We drilled holes around the top to attach copper wire. We stripped and flattened scraps of #12 and #14 copper electrical wire. We attached the wires to the bucket and built an extensive horizontal wire trellis for the turtles to climb on. It was big. Too big! Then we cut it down but the bucket was too big. Our first try was scraped but it was very good practice. The materials were not discarded. Then while out shopping we found two small flat sided brass buckets in a thrift store for less than a dollar each. They were a great find. We sealed them with aquarium sealant and created a hanging wire trellis for one of them. We flattened #14 copper wire to about half its original thickness for the trellis. The trellis hooks over the brass bucket. A bracket to hang the bucket on was made from a piece of brass and was attached to the glass with aquarium sealant. The bucket was planted with club moss and baby tears. Check it out. We were pleased with the first hanging bucket so we fabricated a trellis for the second bucket. This trellis was designed to allow the turtles to go under and inside it as a hiding place. It was planted with club moss and ivy and hung on the other end of the aquarium. Both hanging buckets were positioned to be directly under the aquarium light. Both hanging bucket trellises are designed to permit the turtles to climb on them. The plants will do better if they don't, but turtles do climb branches overhanging water. So we expect our turtles to climb on them from time to time. After all this is being made to increase usable space for the turtles and all plants in their reach are expendable. Similar brass buckets can be found in craft stores. They are sold for use with artificial plants. If you don't want to mess with live plants, artificial plants will work very well. Variations of this design should work even better for lizards, small snakes, and other climbing herps. It only took about two weeks for our turtles to dump the first bucket into the water which made a big mess. The hook of the bracket shown in pic 4 needed to be longer. It also indicated that the design needed modified so we removed some of the bottom wires to let the turtles go under and inside it rather than push up on it. This is all part of the fun of building things for turtles. The turtles will prove what works and what needs improvement. And later the mounting hooks were abandoned for simple copper wire hooks hanging from the top of the aquarium. Then we took out the flower pot we used as a planter in Tour Two: Baby Water Turtles and created a trellis for it. The idea was to create something for the turtles to climb up on, to hide under, and to provide some protection for the plants. This trellis took the shape of an upside down cowboy hat that fits snugly in the pot. Our cardboard aquarium model was useful for judging the overall size. The pot was then filled with plants and the soil was covered with large pebbles. | pic 9 | pic 10 | pic 11 | pic 12 | pic 13 | pic 14 | pic 15 | The trellis is intended
to hold the plants out of the water and provide for easy climbing. The
trellis is also designed for basking, but the turtles usually go right
into the plants. The plants are enjoyed as cover to hide in so it
works well for the turtles. Of course the turtles use the trellis to avoid
being captured at feeding time. Again that's all part of the fun.
Construction Details: All the copper wire was scrap #12 and #14 electrical wire. After the outer sheath was removed, the insulation was removed by striking it with a hammer against a piece of steel for an anvil in the same manor used to flatten the wire. This splits the insulation for removal. Flattening gives the wire more stiffness than round wire and changes its appearance. Round wire works well too. The wire was shaped and placed using a basket weave. All ends were filed smooth and folded under. Some places were soldered using a solder that does not contain lead. Excess solder was removed and the remaining solder was painted. The copper and brass will tarnish in time and develop a pleasing patina. Later as you will see below, we abandoned using solder altogether. Twisted wire joints are enough for our needs and simplifies manufacturing. Copper wire and copper
tubing are readily available. Brass shapes, strips, and small sheets are
available in hardware stores and hobby shops for model making. You can
also find brass items at yard sales, second hand stores, and craft stores.
This is very inexpensive material to work with in the limited amounts needed.
And if you find you like working with brass and copper, save all junk brass
and copper items you come by like we do. A junk item may become inspiration
for a new creation.
Hanging Buckets continued: In time the plants were changed to mostly baby tears and our two hanging buckets were moved to a vivarium for the summer. As the baby tears cascaded down they became great hiding places. Then the baby tears reached the soil and took root. Then creeping fig vine climbed up one of them and took root in the bucket. They became part of the landscape of the vivarium. After another hanging bucket was found in a thrift store, another trellis was made. It was planted with baby tears and placed in the aquarium. The baby tears thrive in the high humidity of the aquarium and cascade down into the water. The small turtles love to hide under it; baby turtles love to sit on top of it. It is important to place it so that baby turtles jumping off land in the water. We found another brass item shaped more like a shallow basket. It is an interesting piece, but the only way we have found to use it so far is to hang it above a vivarium. It is planted with baby tears and adds to the atmosphere of the turtle room. Even though it hangs in front of a window, the baby tears do not grow as vigorously as the ones under aquarium lights. Glass Dish with Wire Trellis: We found a glass dish that we thought would make a good planter for use in aquariums and vivariums. We made a small wire trellis much like the cowboy hat one above so that the plants would extend out from the sides of the dish before cascading down. This dish was planned for use in a vivarium to create a hide box effect. The trellis works as planned, but the turtles did not use it as much as we thought they might. They still preferred the corners of the vivarium. That gave us inspiration for the next use described below. Some time later the glass dish was replanted with a prayer plant and moved near a corner of the vivarium. The plant thrived in it and even bloomed. Here the turtles liked hiding under it. Being elevated prevented the turtles from damaging much of the plant. Raised planters without trellises are useful for protecting other plants from being trampled too. Candle Holders: Thrift stores seem to have an endless supply of brass candle holders. When we found this one we had to make this planter to add to this tour. Take one candle holder, an old brass bowl, drill some holes through the bowl, and screw them together. This piece is really too high for our vivarium so we added it to an aquarium with only small turtles in it. Check it out. Again the variations are endless. You just need some brass candle holders and brass bowls. We have a supply of them we could not help collecting. To make a real jungle
vine covered planter, use several sizes of copper wire to cover a candle
holder. Weave the copper wire to look like vines. You can make the branching
roots and leaves out of copper wire or pieces of scrap copper or brass.
But this time we will let you do the creating.
A Floating Island Planter: Our favorite brass
and copper creations are floating planters. Because we did Tour
7: A Better Island Planter, the floating brass and copper planters
are presented in a separate tour. See Tour
19: A Floating Island Planter.
Copper Development Association Since we only like
to present firsthand information on TurtleTails.com, we would like
to direct you to another web site we find very informative. It is the web
site of the Copper Development Association.
Go there and read about the antimicrobial properties of copper and brass.
If you think of your turtle aquarium as also being your turtle's toilet
bowl, the antimicrobial properties of brass and copper will be even more
appealing to you. Under the Consumers pull down menu, also check out the
articles under Copper in the Arts for more fabrication techniques.
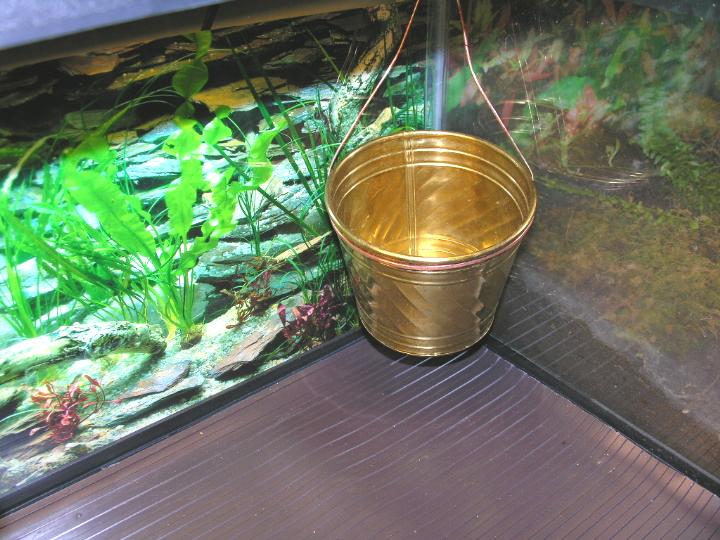
A Hanging Flower Pot in a Bucket Here is another way to hang a plant in an aquarium. We took a round brass bucket in which a clay flower pot fits perfectly. We used cooper wire to make a hanger for the bucket so that it fits neatly in a corner. It was first hung low so that a turtle could just fit under it. They not only hide under it, they climbed on top of it from the piece we will show you next. We finally raised it to allow more turtles under it. The philodendron
was not our first choice when we were looking for a plant for our bucket,
but we were before the house plant season stocking. Philodendrons do not
hold up well to turtles climbing on them. If this plant survives, we will
make cooper wire hangers to keep the advancing vines above the water.
Basking Branches Our next piece was designed to set next to the hanging flower pot shown above. It is an attempt at imitating thin hanging branches in the water. This design is also an attempt at abstract design. The back side has fewer legs so that the turtles can go through it to hide under the bucket. It works well but is too light for the three cooters. They push it around the aquarium. It will work better for smaller turtles. The cooters also used it to climb on top of the philodendron. This piece was made
by flattening various sizes of cooper wire. Some of the smaller wire was
salvaged from our first failed copper creation. The thick wire became very
stiff after being hammered enough to flatten it. We will be working on
our technique again in the future.
Corner Hide Box We needed a bigger corner piece to replace a concrete and stone piece we made years ago. See Tour 12: Many Uses for Concrete. We also wanted to allow the turtles to go under it since it will take up more space. And we wanted to try using scrap copper tubing. The first step was to figure out how to hold the pieces together. What we thought was brass nails made good rivets, but they were only brass plated steel nails. We could not find brass nails or rivets locally so we made our own from straight pieces of brass rods. Once we were satisfied our rivets would work, we could get started. The hard part was getting started. We flattened a number of pieces of copper tubing and filed the ends smooth. We were working in the abstract again so putting the first two pieces together was the hardest part. Then piece by piece we added to it. After breaking several drill bits, we switched to thicker rivets. Thicker was better so we kept going. It was like putting a puzzle together as we made new pieces to try. Its different; take a look. | pic 41 | pic 42 | pic 43 | pic 44 | pic 45 | pic 46 | pic 47 | pic 48 | Because it was made
to fit in a corner, there is only one leg to hold it up in the corner.
This piece weighs two and one half pounds so it will not get pushed around
easily. It is big enough for our three juvenile cooters to hide in with
room to spare. We will allow it to develop a natural brown patina.
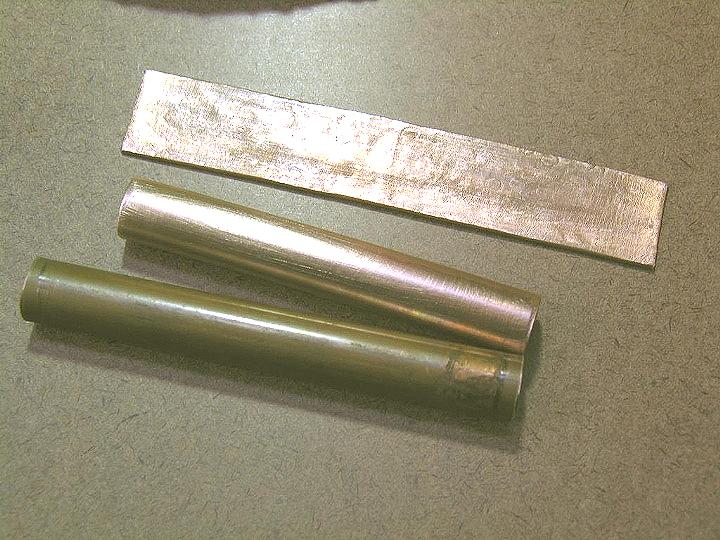
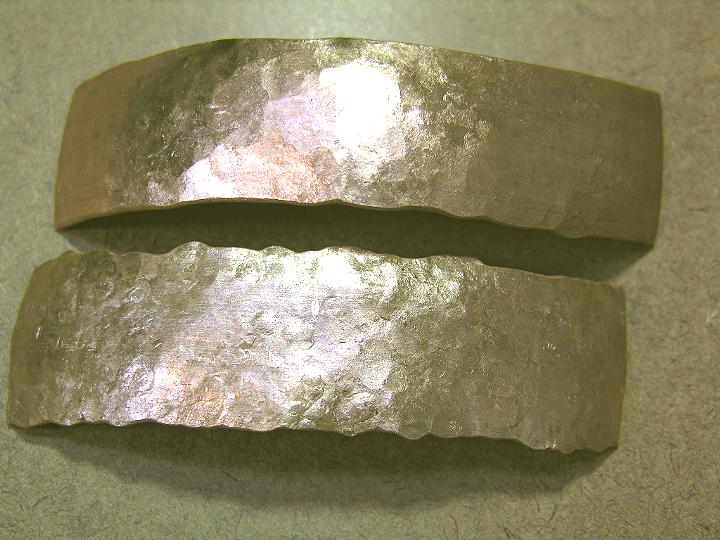
Working with Copper Tubing The copper tubing we are using is the copper tubing used in household plumbing. It is 99.9% pure copper. It is commonly sold as straight lengths and as coils. The coils are softer than the straight lengths. We are using 1/2" tubing. When purchasing tubing, you may see designations like "Type M" stamped on the tubing. The type indicates the wall thickness which we are not concerned with. Our scrap tubing was removed from our house because our well water is acidic and eats away at it so it is not as thick as it originally was. You should know by now that part of our challenge is to make things with minimum cost. Copper and brass "work harden". You have probably work hardened a paper clip before. Some metals become harder when "work" is performed on them like when you bend a paper clip. Each time you bend it, it hardens more until it is brittle and breaks. Copper and brass also become harder as we hammer on it and bend it. It will eventually become brittle. Many iron based metals like steels can be hardened by heating them and then quenching them in water like a blacksmith tossing a hot horse shoe into water. Many are also softened or "annealed" by heating and cooling slowly. Copper and brass are just the opposite. Copper is annealed by heating and quenching in water. Just heating copper and air cooling will not soften it. Copper may also be worked hot and annealed repeatedly after working it. For our pieces we started with pieces of copper tubing and shined them with a piece of used (worn out) sandpaper to remove most dirt and oxide. We flattened it with a hammer against a piece of steel we use as an anvil. Then we hammered it more to change its surface appearance. To roughen the surface even more, use the ball of a ball peen hammer to deform and curl it. Striking the edges with a ball peen hammer eliminates the straight edges. Most of the hammering is done on the back side of the pieces as they will be used. For a piece of tubing to be curved in the flat after it is flattened, it must be curved before it is flattened. This requires a curved piece of scrap, a tubing bender for straight lengths, or soft tubing that comes as a coil which is intended to be bent as needed. Bending flattened pieces the easy way is easily done by hand or as it is hammered. We will show how
we make and set the rivets in the next piece.
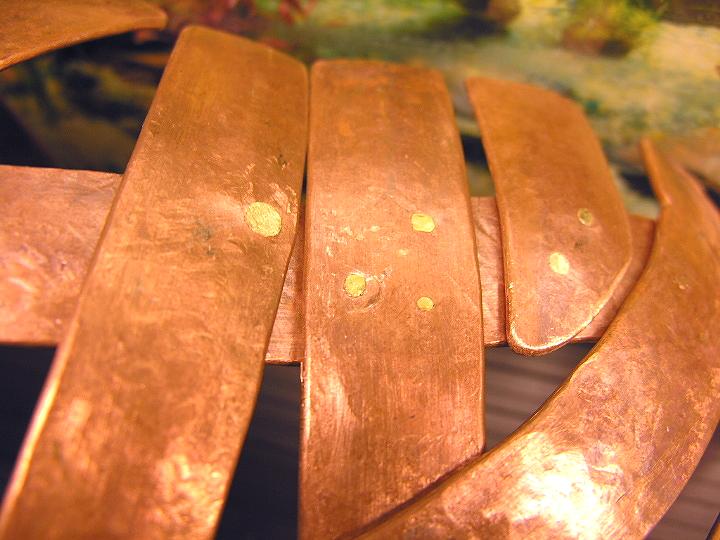
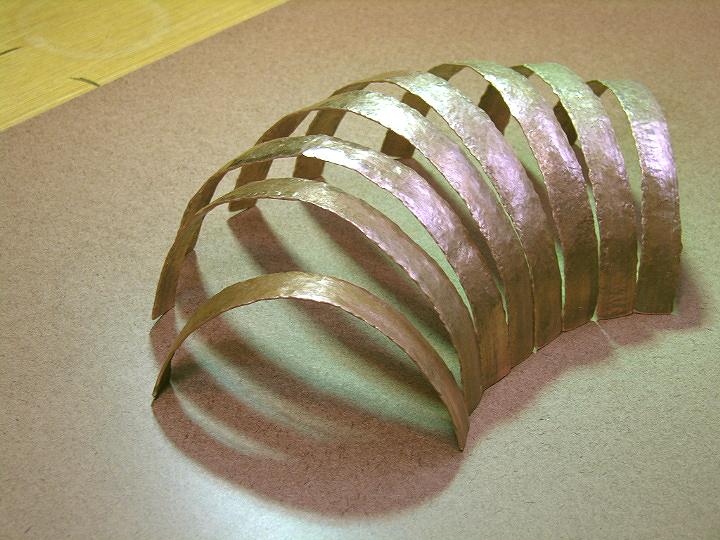
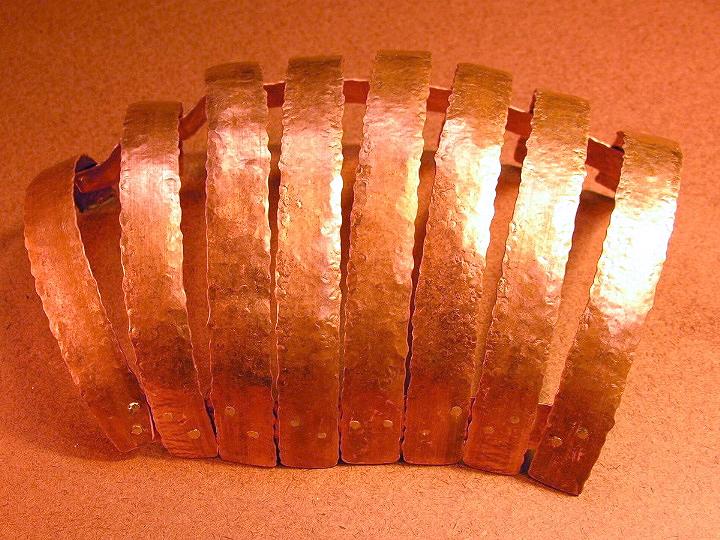
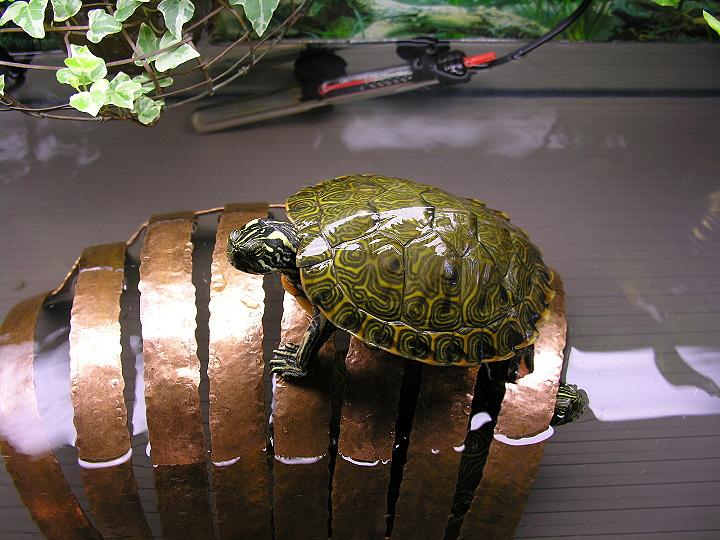
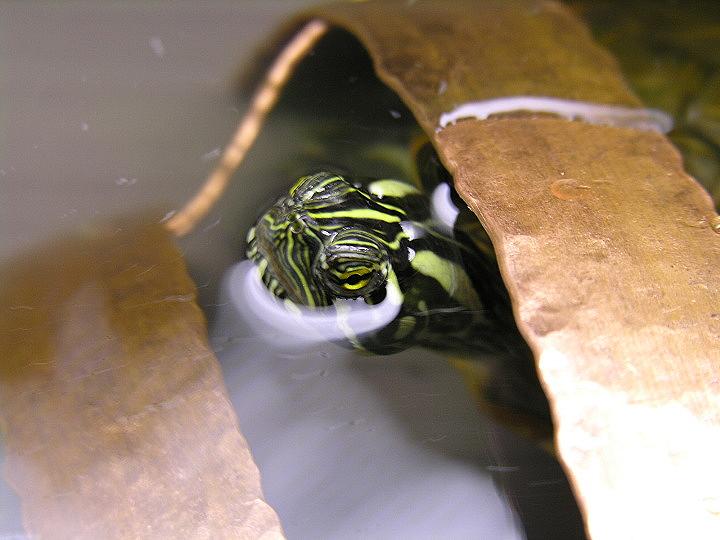
A Hollow Log This piece is another abstract design. This time it is a hollow log for turtles to hide under and bask on. We have progressed in our technique by roughening our tubing so that it is not as recognizable as tubing as the corner hide box is. We simply hammered it more with the ball of a ball peen hammer. We also produced eight pieces and laid them out before starting assembly. This made getting started very easy. But before we started assembly we had to make our brass rivets by cutting pieces of .094" diameter brass rod. We held the brass rod in our bench vise and cut off pieces with a hacksaw. Each rivet was then held in the vise and the ends filed flat and deburred. Sawing simply reduced the amount of filing we had to do on each rivet. We just approximated the lengths. If a rivet was too long at assembly, it was just filed down to size. The last item to be prepared was our rivet anvil. We smoothed the head of a railroad spike which works well in our bench vise. After preparing a cross member and fitting it to the inside, we used a vise grip pliers to hold two pieces together while we drilled a hole for the first rivet. We used a nail as a punch to put a dimple in the copper so that the drill bit would not slip around when starting the hole. After the hole was drilled a rivet was placed in the hole and the piece held just off the anvil so that the rivet extended from both sides while toughing the anvil. Then it was a matter of flattening the rivet with a ball peen hammer. Each rivet took a bit of hammering. We were interested in strength not perfection. Two rivets were used for each intersection of tubing. After attaching four pieces to the first cross member, they were attached to the second cross member on the other side. Then it was a matter of fitting and adding pieces. This piece also weighs about two and a half pounds. We considered drilling various sizes of holes randomly spaced for the turtles to use as foot holds but we gave it a test drive first. Our three cooters had no trouble climbing up on it. So we will use it sans holes; we can always add holes later. We will also allow
the hollow log to develop a natural rich brown patina. There are many methods
to add patinas which we have not explored. The nice thing about patinas
on brass and copper is that they can be removed and new patinas added.
If you think you may like to try making something with copper and brass, start saving scraps of copper wire, old copper tubing, and anything else that is copper or brass you would normally discard. You just don't know what might inspire you. We hope we have given
you some ideas so that you have fun creating interesting environments for
your turtles.
|
