|
A Floating Island Planter
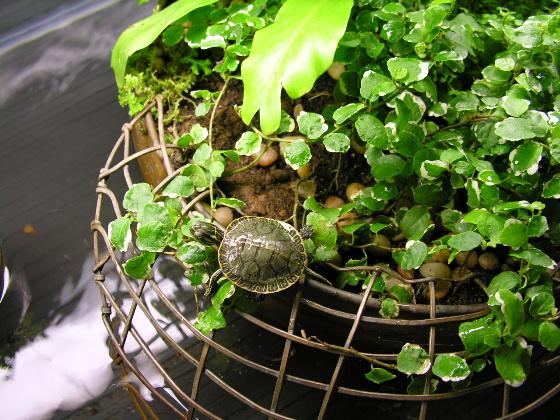
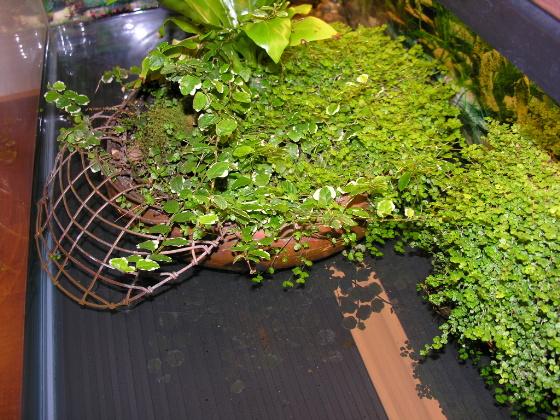
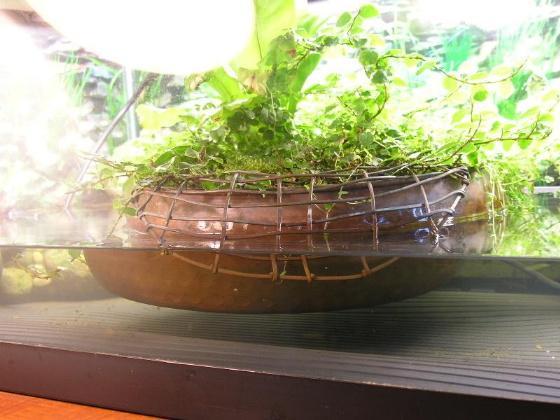
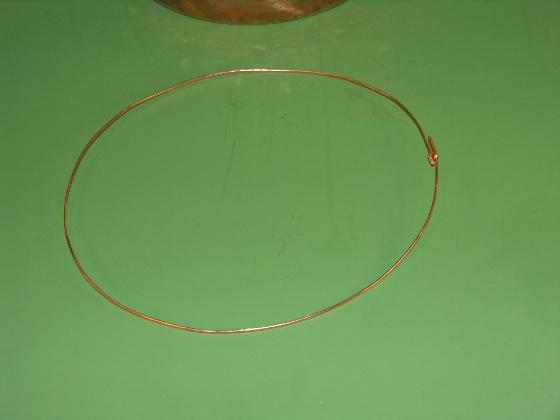
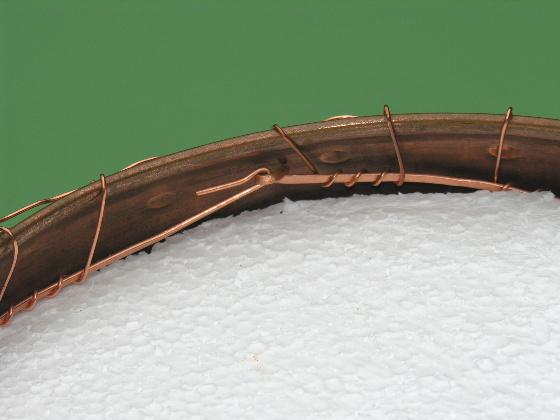
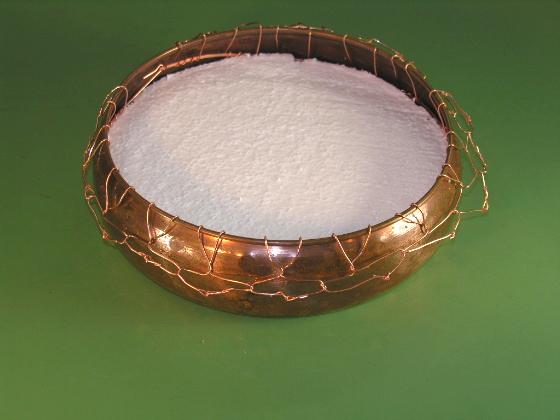
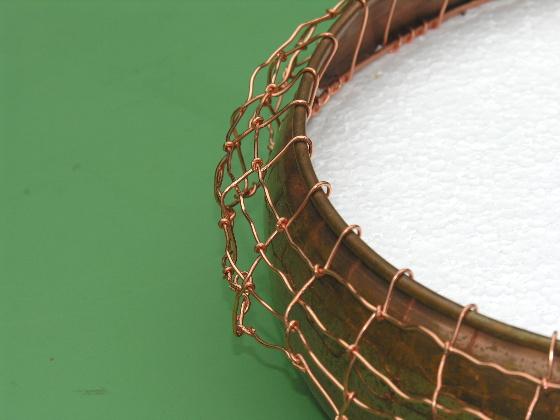
This tour takes up where Tour 18: Starting Baby Water Turtles leaves off. We could have included this design in Tour 18 or Tour 13: Using Brass and Copper. But since we show how to make an island planter in Tour 7: A Better Island Planter, we will devote a tour to this design. We were motivated to dream up this design for three reasons. First you know if you have an aquarium how dirt collects under or around anything standing in the water. We wanted to remove places for dirt to collect under our planter. Secondly we wanted to simulate a floating log that is free to move and great to hide under. And as you know by now we like to use plants; we wanted more plants in our aquarium. Our first floating island was made for W our spotted turtle, Pincushion our baby western painted turtle, and other small water turtles. It works very well for small turtles and is ideal for baby water turtles. Lets take a look at the three pictures from Tour 18 and some additional pictures. | pic 1 | pic 2 | pic 3 | pic 4 | pic 5 | pic 6 | pic 7 | pic 8 | This island is 12" in diameter and is floating in a 30 gallon breeder aquarium. A hanging brass planter is also visible in the pictures. See Tour 13: Using Bass and Copper to see how we make the hanging planters. This island has a heavy flattened wire trellis large enough to extend into the water. It was designed to allow the turtles to climb up and onto the island, to sit on, and to hide under. It does all three very well. It also creates an imbalance which we chose not to correct. It is planted with a birds nest fern, baby tears, variegated creeping fig, moss, and small ferns. The birds nest fern can grow too large but the leaves may be trimmed as desired. The baby tears cascade freely into the water. Pincushion was frequently seen in the foliage. The other turtles were not seen on the island but it was obvious they used it by the hole under the birds nest fern and dirt in the water. The dirt was just potting soil which is clean dirt that does not foul the water like left over food would. You know we do feed our turtles in their aquariums. So lets make a floating island planter just for baby water turtles. We found a 10" pan which will fit in a 20 gallon long aquarium. It will also fit in the 30 gallon aquarium with the larger floating island. We could not pass up this item when we came across it at our favorite source of brass supplies. These pans have a great shape for this purpose. | pic 9 | We cut a circle out of scrap styrofoam packing material. We just pressed the pan down on it to make a depression and then cut it out with a knife. There is no need to be neat about it. Several smaller pieces will do if a large piece is not available. The stryofoam drops inside the pan for floatation. There is no need to glue it in. The potting soil and plants will secure it. | pic 10 | A heavy piece of wire was shaped into a circle which fits inside the pan. It was cut to fit snugly inside the widest part of the pan. It will anchor our trellis. Then we clamped the wire to our work bench and twisted 12" long pieces of #18 copper wire around it. After all the short wires were attached we placed the assembly in the pan and crimped the larger wire tightly. We were in a hurry and just twisted the short wires together - see pic 15. We were not happy with it so we untwisted the wires and started over (we like working with copper and brass because we can easily rework it). We took our spool of wire and began working it around the pan in a continuous loop until we ran out of wire. Then we randomly looped the ends together using all the wire. We used an entire 25' spool of wire. We put a kink in all straight lengths of wire so it will look more like roots when the copper wire develops a patina. No solder was used. All wire ends were filed first so they are not sharp. Baby water turtles are excellent climbers. They will not need the wire at all once plants like baby tears cascade down into the water. The wire trellis can be bent up or down depending on how it looks. That is one of the nice options this lighter copper wire provides. The trellis on the 12" planter is too heavy to reshape easily. Potting soil was placed directly over the styrofoam. If a plant needed more depth, a hole was cut out of the styrofoam as needed. Then we added plants to fill the planter. No pebbles were used because we do not want to make this planter heavier than necessary. Of course our plants get high humidity. An added bonus is easy rotation of the planter so that all the plants get even light. To be sure the turtles and the current from the filter will push it around. The island can be tethered with a piece of wire hooked into the trellis and another object like our hanging planter trellis - see the tether in pic 18. We normally use just enough water to cover our submerged filter. If we have larger turtles in with the floating planter, we will add just enough water for the turtles to move freely under the floating planter. Our first planter was swamped once. We had the return from the filter pointing up to agitate the surface of the water. A turtle must have climbed on it causing water to be pumped into the planter. It simply filled with water and sank. Because it was established with plants it did not make a mess. We simply drained the water off into a bucket and returned it to the aquarium. The filter return was repositioned and everything worked as planned there after. We have not used legs on our planters since we are only using them with small turtles. Three or four legs could be added extending from the bottom of the planter to prevent the island from swamping while still permitting it to float. Finding the right pan is key to making a floating island. It must be light weight and stiff enough to hold its shape. If you use an aluminum pan, use aluminum wire. Do not mix aluminum and copper together in water. They may set up a galvanic reaction that can dissolve one of the metals. If you use aluminum and do not like the color, paint it. This is one of those projects that has more to do with finding the right object to start with. Our two pans are narrower at the top than midway down. This adds stability when a turtle climbs aboard. A wide flat pan would tip over more. Like most of our projects we play with it, experiment, make modifications, and watch for a better item to come along. When we are successful we like to share it with you. We had the 12" pan from a water fountain and did not hesitate to purchase the second 10" fountain when we can across it. We needed it to illustrate this tour since we did not photograph the making of the 12" floating island. The 10" floating island was an expensive project. It cost $10 for the pan and wire, but we have a pump, smooth stones, and fountain assembly left over. If we spend another $10 on plants - $20! But what can we purchase in a pet store that would look and work as great - nothing we have found! Where else can we find ideas like ours - don't know! That is what makes TurtleTails.com so much fun. We like to be original and share our ideas with you and your turtles. Keep watching. There will be more. If you have a successful project and wish to share it with us so we can try it, we welcome your ideas. We hope you enjoyed our nineteenth behind-the-scenes tour and we hope you can't wait to build your own floating island planter.
|
