
|
The idea of using clay we dug from the earth to bake good bread was appealing to us, and we decided on a mud oven. Mud Ovens have been in use for thousands of years and are made of a clay-sand mixture baked by the wood fire used to heat it. Baking of bread or pizza is done using heat retained in the clay after the fire is removed. Mud ovens have many other names: Earth Oven, Clay Oven, Adobe Oven, Bee Hive Oven, Quebec Oven, Roman Oven and El Horno, based on what they are made of, what they look like and where they are used. The design that we used is basically the oven described in Building Your Own Earth Oven by Kiko Denzer, published by Hand Print Press with the modification of a metal doorframe and door similar to those used in Quebec Ovens as described in The Bread Ovens of Quebec by Lise Boily and Jean-Francois Blanchette, published by National Museums of Canada and the additional modification of a chimney above the door. |
|
 |
The door and doorframe were fabricated by Manahan Machine Shop from ½ inch steel and is smaller than the traditional cast iron doors used on Quebec ovens in order to fit the smaller size of our oven. The oven doorframe is 13 ½ inches wide at the bottom to fit 3 firebricks, and 12 inches tall to maintain the traditional 63% of door height to inner dome height, which is 19 inches. The chimney has a 4-inch interior diameter. |
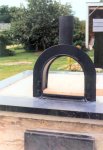 |
The doorframe was cemented into the 4-inch think cement slab. |
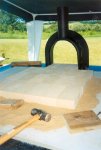 |
Firebricks were laid in a bed of sand on the slab to form the floor of the oven. The sand was ½ inch deep to keep them level with the ½ inch base of the doorframe. |
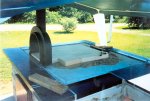 |
It is very important to get the bricks as even as possible as this is the floor of your oven. |
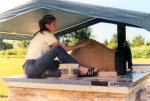 |
Sophia is using wet sand to form the inside of the oven. We used sand mined from sandstone. It was easy to form and dried with a hard surface. We prepared the sand form the day before we put on the clay. The inside dimensions are 24 inches wide and 34 inches deep. The sand will be removed to form the void in the oven. |
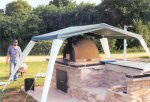 |
A temporary tent was set up over the oven to protect it from melting in the rain, or from drying unevenly in the sun. |
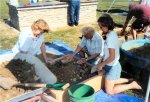 |
Connie, Lois and Sarah rub the dry clay though ¼ inch hardware cloth on a board frame. The screening removed the rocks and the evenly sized pieces of clay were easier to mix. The clay was dug the year before in South-central Minnesota, watered down before winter, frozen during the winter, than dried out. The freeze-thaw cycle made the clay break down into smaller chunks that were much easier to work with. |
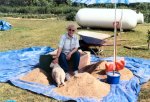 |
The sifted clay on the blue tarp under the umbrella reminded us all of a day at the beach. Lois and Sparky take a break from sifting clay. |
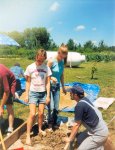 |
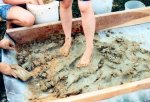
The clay is mixed with sand and water. Mixing the clay with your feet is not only fun, but also the easiest way to get the job done. Sarah and Sophia mix while Tim gets ready to move the clay sand mixture to the oven. |
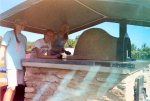 |
Susan, Sarah and Sophia prepare to put on the first or thermal layer of clay. |
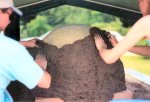 |
The first thermal layer was 2 inches think, and we used what we thought was pure clay. We later discovered that it had a high silt content and most of it broke away from the outer layers of the oven when we fired it. This was very discouraging. Kiko Denzer was kind enough to give us advice via email on relining the oven with a purer clay after it was built and this has held up well. It is definitely worth the time to test your clay and the clay-sand mixes as Kiko explains in his book. |
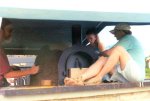 |
Kirby, Sophia and Susan finishing the 1st thermal layer. The inner door and a leftover firebrick hold in the sand. |
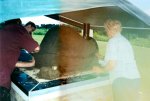 |
For the 2nd thermal layer we used a clay-sand mixture an additional 2 inches think. |
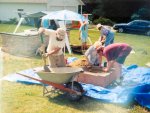 |
The oven-building day brought together family and friends. Mitch brings dry clay, Lois and Kirby sift clay, Susan and Scott mix the clay and vermiculite, Sophia puts the mixture on the oven and Sparky looks for trouble. |
 |
The 3rd, insulating layer was 6 inches thick and made of vermiculite with just enough wet clay to hold it together. |
 |
Francis takes a well-deserved break from the 85 degree heat while Sarah shows off the oven. |
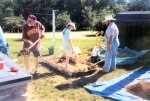 |
Susan and Scott mix the chopped straw, clay and sand with water for the final outer plaster layer, and Kirby delivers it to the oven. |
 |
Lois and Francis apply a 2-inch thickness of the plaster layer to the oven as Kirby brings them more material. |
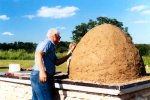 |
Francis smoothes the final plaster layer. |
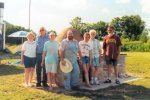 |
Connie, Francis, Susan, Scott, Sarah, Lois and Kirby stand by the finished oven, about 7 hours after they started the first step of sifting clay. |
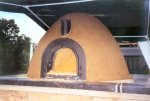 |
The inner door was removed to allow the sand to dry from the inside as the clay was drying from the outside. |
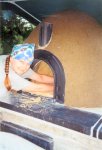 |
Susan removes sand from the oven. |
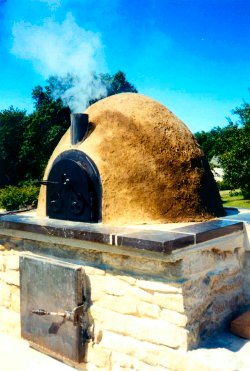 |
The first fire in the
completed oven!
The square door below the oven opens to a metal box for storing a pail of
ashes and hot coals safely.
|
 |
After much of the 1st and 2nd thermal layers of the oven collapsed, we found a source of purer blue-green clay in a nearby road cut and mixed it with sand and water to reline the oven. |
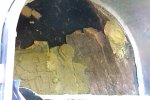 |
The top of this photo shows where the thermal layer has fallen down, exposing the insulating layer. We removed any loose clay and relined the existing thermal layer with a one-inch coating of the new clay sand mixture. On the top of the inner dome, were the entire thermal layer fell off, I put a 4-inch thermal layer. The dark gray on the right side of the picture shows the remaining thermal layer. The middle shows where I have painted the baked clay with slip (clay mixed with water to the consistency of thick paint) to help adhesion, and a flatted ball of the new clay-sand mixture that I have thrown onto the crack. The left side shows were the oven has been relined and pushed into place with a small board. The entire inside of the oven was painted with slip and relined with the clay-sand mixture. The final step was smoothing the inside with a large metal spoon. |
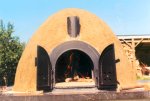 |
The South-central Minnesota clay-silt in the vermiculite and sand-straw mixtures worked very well for the outer layers, with little cracking. |
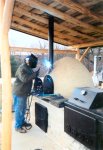 |
Nick does the final welding to attach the chimney to the mud oven doorframe. |
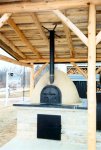 |
The mud oven is finished and ready to bake! |
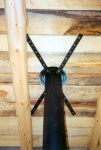 |
The braces hold the chimney secure. The coil of light steel around the chimney acts as a heat shield between the chimney and the wood on the roof. |
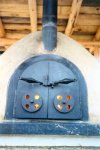 |
A wood fire heats up the mass of the mud oven as the smoke goes up the chimney. The air vents in the outer doors can be adjusted to control the rate of burn. The vents are located low in the door so the air flows in at the floor of the oven and returns out the chimney. |
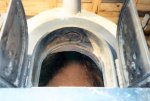 |
The new blue clay thermal layer has been baked to a hard terra cotta. Inside the doorframe is the support for the inner door. |
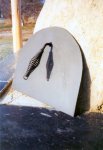 |
The inner door. |
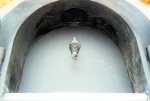 |
The fire and coals have been removed. The inner door holds the heat in the oven and closes off the chimney. |
 |
A small ring of fire is left in the oven when baking pizza. The radiant heat helps bake the toppings and gives the pizza an amazing smoky flavor. |
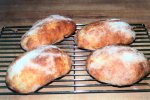 |
Bread just out of the mud oven. The smell of bread baking in the back yard is truly wonderful. |
| Click on some of the other options in the menu above for more information on the mud oven and barbeque-grill. Back To Top | |
| Please contact Tim or Susan if you have questions about our outdoor kitchen. We would appreciate any feedback regarding this website. | |
|
|