

BEFORE YOU CONTINUE
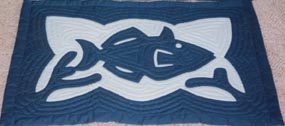
So far your quilt making project has gone fairly fast and look what you've accomplished. You have a quilt top basted and ready to applique. Spread it out and admire. Take a picture or two. Pat yourself on the back. Brag a bit to friends, family and anyone else who will listen. Then take a deep breath and get ready to settle in for the long haul. It is not difficult to make a Hawaiian quilt but it requires a great deal of time and patience. This next stage will take several months.
APPLIQUE -- MATERIALS
For this you need standard weight sewing thread in the color of your design. Cotton-wrapped polyester works better than pure polyester because it stretches and tangles less. The most popular applique needles are either size 8 or 9 sharps but many quilters prefer Milliners or Straw needles in these same sizes because of the extra length. Beeswax rubbed on the thread before sewing helps prevent tangling and can be purchased in small containers at fabric stores.
It is also available in larger blocks at many health food stores or from candlemakers.
APPLIQUE --BASICS
The basic applique stitch is a small overcast stitch, 10-14 to the inch. Starting in or near the center of your design turn under 1/8 to 1/4 inch on the edge of the fabric and begin overcasting. Do not try to baste before stitching, it's almost impossible. Turn fabric edge under as you go, finger pressing 1-3 inches ahead of where you are working. The tip of the needle may be used to smooth fabric into place on curves and in corners. Very tight inside curves may be clipped but avoid doing so if possible. On long bias edges a pin placed vertical to the edge a few inches ahead of stitching will help prevent stretching or pulling of fabric. This technique may also be useful on outside curves.
Start your stitching on face of quilt top with thread knot beneath the turned under edge of the design fabric. End threads on back with a small knot into background fabric behind the design. Always run end of the thread between layers of fabric before cutting off. If left hanging it may later show through a light background as a dark streak.
POINTS, VALLEYS and PUKAS
For many quilters, these are the most difficult areas to applique and so deserve special attention.
Points are essentially self-defining and there are many of them in any Hawaiian quilt. Leaf tips, flower petals or any sharp outside corner are common examples. There are several methods of making a smooth point. None is particularly superior to the others but this one works very well.
Applique as usual to within 1/4 inch of the point, then take 1 extra stitch in the same spot to secure fabric. There is usually no need to trim point. With tip of needle turn point under, parallel to the finished edge. Then fold under new edge neatly along applique line, tucking in any excess fabric with needle tip if necessary. Take a stitch as close to point as possible
through all layers of design fabric.Then continue appliqueing as usual down the new edge.
Valleys are best defined as the "V"s where the design makes a sharp inside angle or where two parts of the design meet. The junction of 2 branches or of a flower stem with a branch are examples.
As you appplique down the sides of the valley, you will have decreasing ammounts of fabric to turn under, until at the base there is almost none. To keep edges secure, decrease the spacing of your stitches and use tip of needle to turn under fabric as you approach the base of "V". At the base smooth under with needle and take 2-3 stitches together into same spot making a fan shape. Then continue applique up opposite edge, gradually increasing fabric turn under and stitch size to normal.
Pukas, (remember them) are the design elements which may appear throughout your basted quilt either as slits in the fabric or as nicks in the center of what will eventually be a small opening. Appliqueing the slits is easy. Start in the middle of one side, turning under as usual. Approach the end of the slit as if it were the base of a valley, make your fan of 2-3 stitches and continue up the other side. Repeat the process at the other end and return to start.
Small, shaped openings are a bit more complicated. First, use a chalk or other marking pencil to outline the finished size and shape of the opening on your fabric. Then, starting at the nick which you have cut in the center, use small, sharp, sewing scissors to make vertical cuts out to this line in 6-8 places. This will result in small tabs of fabric fanning out from the center toward the edge. Without trimming, fold under tabs, smoothing with needle tip. Applique as usual with very small stitches.
AS TIME GOES BY
Don't become impatient. While you applique you will still be making some final adjustments to your layout. Better to do it now than to have to rip your work out later.
Don't get discouraged. Look at what you've done so far and congratulate yourself. You knew this would take time and unlikely as it sometimes seems, you will be able to finish.
Don't expect perfection. In quilting as elsewhere, it exists only as an ideal -- never an attainable goal. The best and most experienced quilters make mistakes. Learn from yours, don't repeat them, and don't give up.
Above all, this is supposed to be fun. Relax and enjoy it.