|
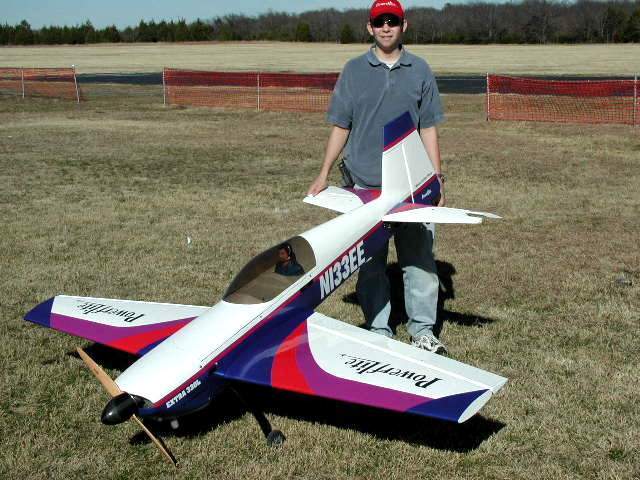
|
| Me and the extra right before its first flight. |
I managed to damage
the Extra on its second flight. Go to this link for the story as well as pictures..
H9 330L damage.
Pre flight pictures:
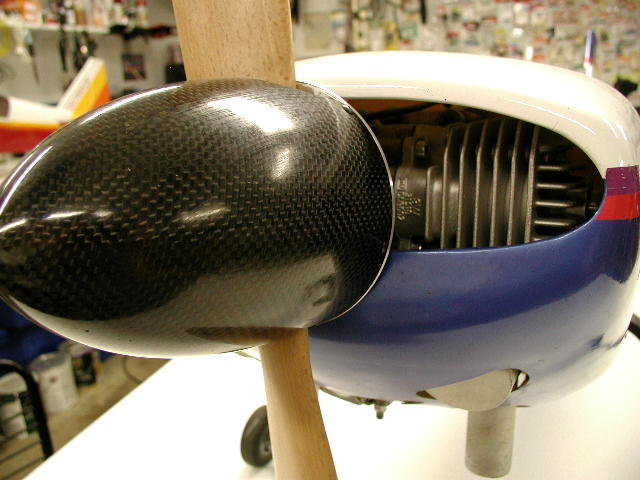
Here is the nose, showing the 4.5" bullet style carbon spinner available from Pete model. The 3W 85 twin
balances this model perfectly, and has plenty of power for unlimited vertical, and hovering at slightly under 1/2 throttle.
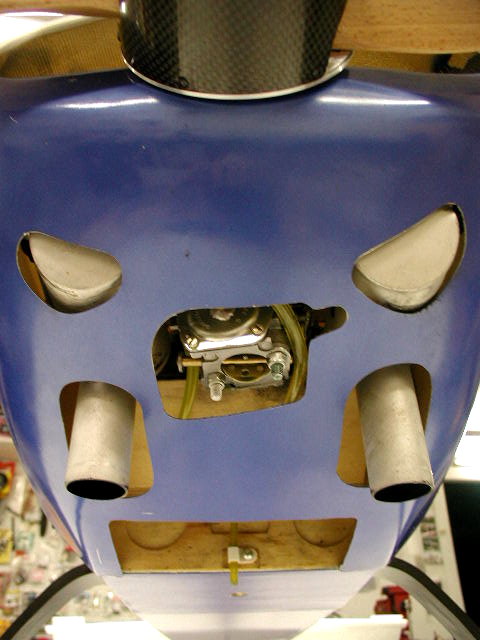
The engine and muffler cutouts. I always like to clamp
the vent to the lowest part of the fuse.
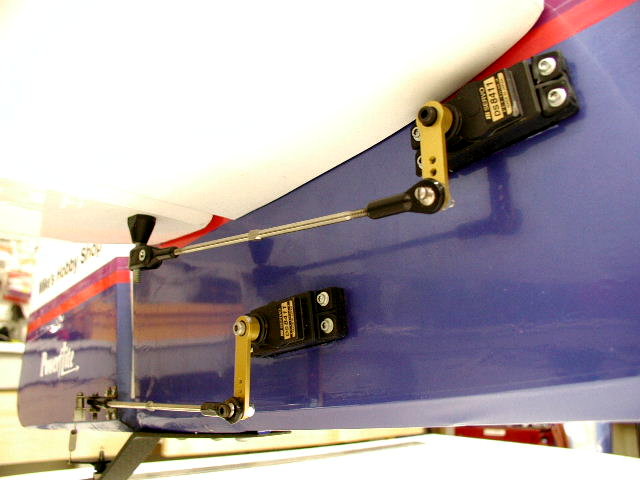
The servo setup. A JR DS8411 on each
elevator half, and two on the rudder. H9 titanium rods, Nelson ball links, and H9 anodized 3D arms link the servos to the
surfaces.
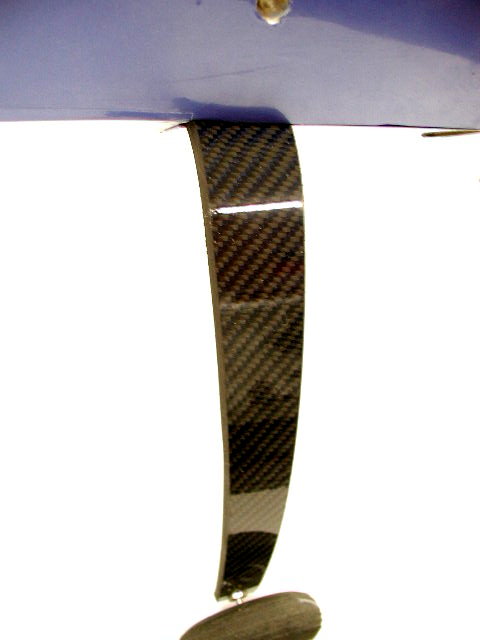
Carbon gear available from Troybuilt. Made by Graphtech
RC. The blue carb/kev top laminate shows up, but is not as noticable, or bright as I had hoped. I plan to upgrade
the current 3.5" wheels, to 4.5" Dubro wheels.
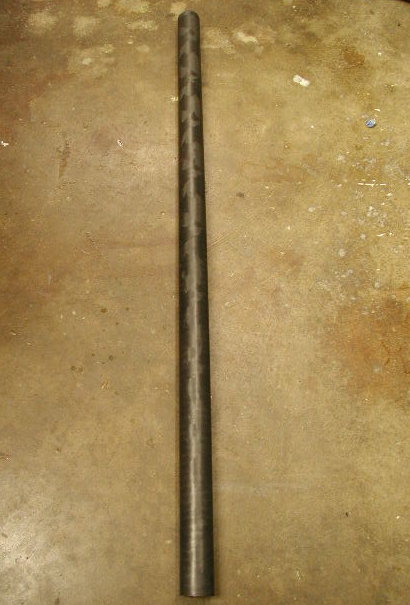
The carbon wing tube, available from Troybuilt. I saved almost
4 ounces, but, it will not bend or give way during a serious crash like its aluminum counterpart.
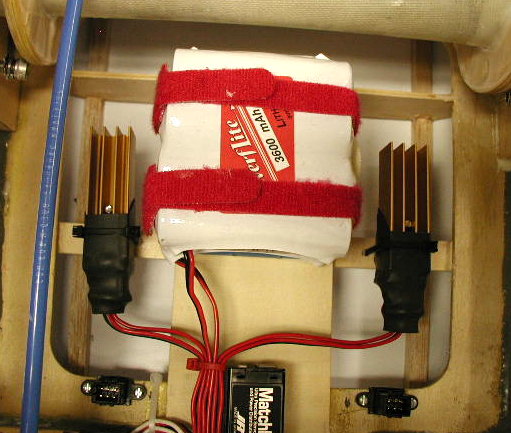
Two 3600mah PowerfLite packs, provide in pack,
as well as wiring and switch redundancy, while the two cool looking and functional PowerfLite adjustable regulators lower
the voltage to 6.5 volts. The balance is slightly aft due to the battery placement.
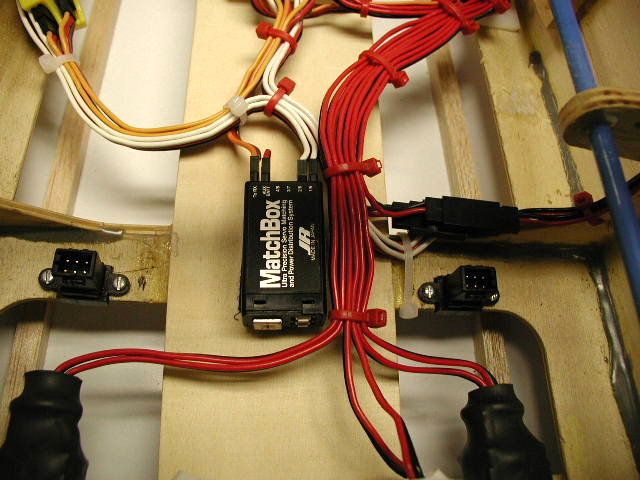
I tried connecting the rudder servos by a Y harness,
but they fought each other terribly at 3D rate. A matchbox was an easy way out on this problem. It was easy to program, and
now there is absolutely no binding between the two servos.
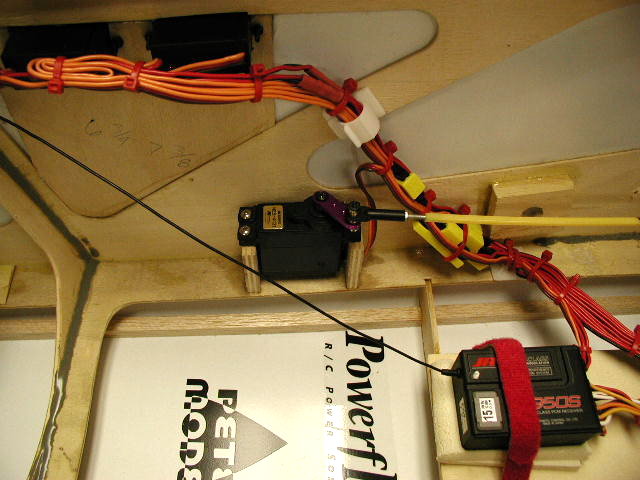
I dont remember why I posted this pic.
You see the 950S receiver, the two switches, the 4131 throttle servo, and the wiring...
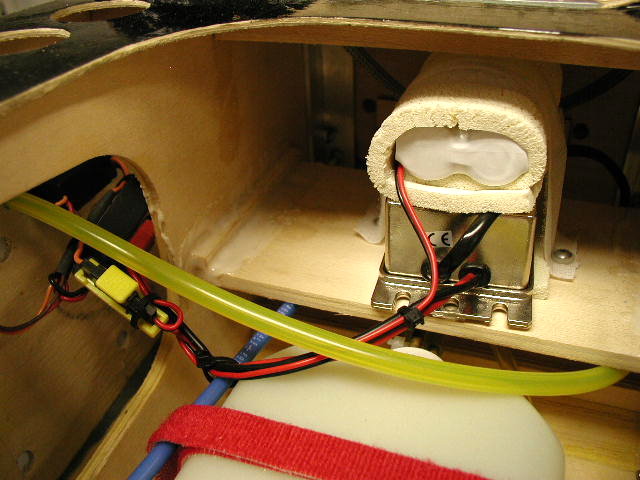
Heres how I did the ignition... Pretty straightforward...
The 2000mah Powerflite is wrapped on top of the ignition module.. The regulator and switch are to the left in the fuse.
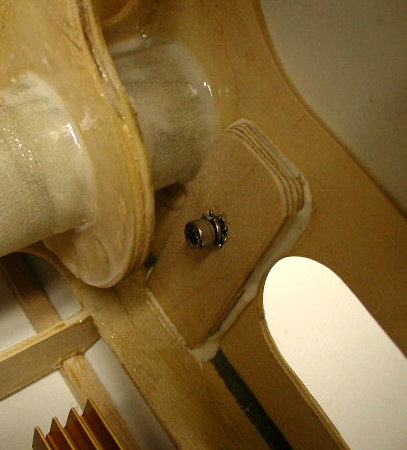
When I ordered the carbon wing tube, the stock method
of wing retention had to go out the window, because you cant drill and tap the carbon tube for the 4-40 bolt like the
old aluminum tube. So, I devised a simple captive retention method, as usually employed in other giant scale kits. I
drilled through the fuse with the wing attached, making two aligned holes for the bolt. I put a 10-32 blind nut in the wing,
and a 1/4" ply doubler on the inside, in the strongest, most reinforced area by the wingtube itself. I epoxied this with Aeropoxy,
and enlarged the hole for the 10-32 bolt and lock washer. So far, this is a reliable setup. Nothing became loose from vibration.
|

