|
I've performed some mods on this plane, and have had alot of questions about their performance and
how to do them. Maybe you'll see some that interest you?
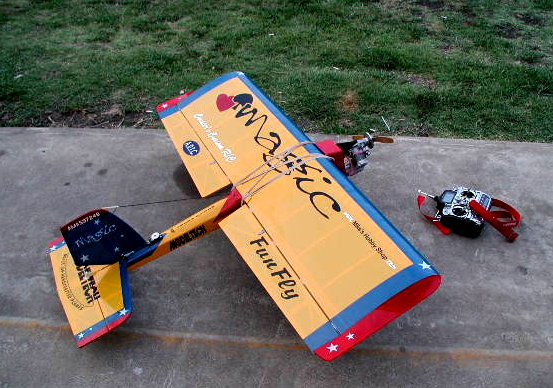
Equipment choice:
Engine: OS .46 FX, w/ removed exhaust baffle. All sealed with High temp silicone.
Prop: I prefer the Zinger 12x4, the APC takes time to "spool up"
Wing servos: Two (2) Hitec HS605 BB servos.
Rudder servo: Hitec HS225 BB servo
Elevator servo: Hitec HS225 BB servo
Throttle servo: Hitec HS81 metal Gear servo.
Battery: PowerfLite 606X, AA size, two cell pack, 1.3 ounces. No regulator.
Switch: JR chargeswitch.
Receiver: Hitec Supreme 8ch 3600, JR shift.
Above what came with the kit, I bought:
-
Small Haighes style tailwheel
-
Kevlar thread by K&S for flying wires
-
GP (small) landing gear straps for flying wires.
-
5.7 oz CF tape for firewall reinforcement.
-
GP 8 oz fuel tank, I wouldn't use the stock tank.
-
Clear monokote for sealing hinge-gaps.
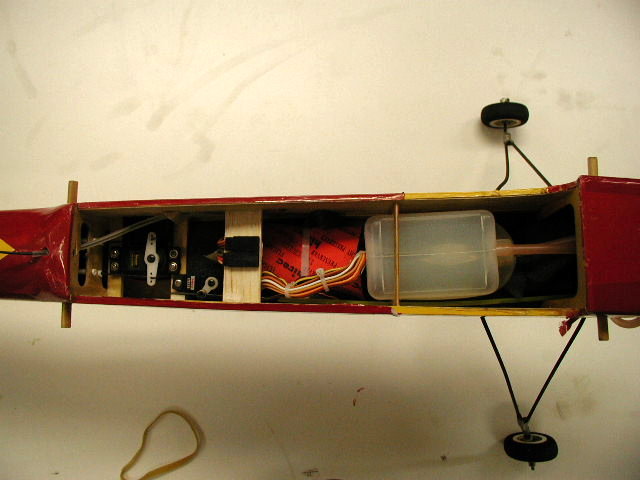
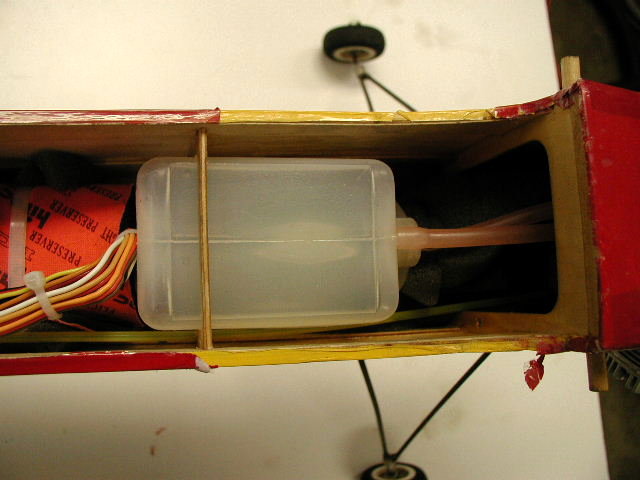
Here is an overview of the stuff that makes
the plane go. It took some fine tuning to get it this far, I think I have it tweaked. The tank is located slightly forward
the CG, and with the heavy 46FX, the stock servo tray was discarded in favor of rear mounted beam mounts and tail servos.
I stuck with the stock wire pull/pull for the elevator, I didnt want any slop on the controls from Kevlar or cable. Tail mounting
the elevator servo with a pull pull setup was out of the question due to the current placement of the rudder servo, the
rudder istelf, the tailwheel, and fuselage formers. I was not about to use a pushrod and live with the flex it would
bring. Since I dont like loose wires, I adhered the wing servo connectors to a 1/4" peaice of balsa
for extremely easy access during pre-flight assembly. This also helps me tuck away snugly the receiver pack. The 650mah
PowerfLite two cell AA size pack is placed above a hatch behind the rear shown former, to help add tailweight. The
Throttle servo of choice is a HS81BB converted to metal gears. I have enjoyed this servo for the throttle.
I have experienced no slop or delay at all.
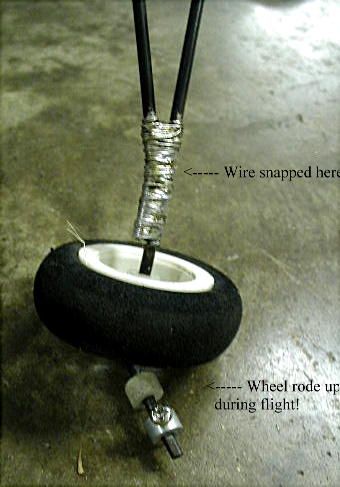
The factory landing gear did everything but impress
me.. Done as per the instructions, both side's wheels rode up like this after the first flight. This made for a tricky landing. Also,
during taxiing on an asphalt runway BEFORE the first flight, the right landing gear rod snapped above the weld.
Obviously very weak music wire.. That required me to reinforce, wrap with wire, and solder the gear back together. I did this
on the other side, to be safe.. Now, Moose Carbon fiber offers
a Carbon fiber version of this gear, at a very tempting price. I intend to pruchase some and see how they perform. You
cant go wrong with carbon....
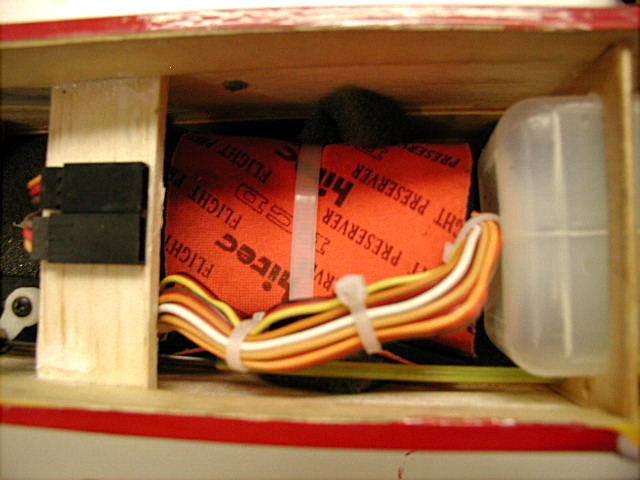
You can see better where I put the receiver, wiring,
and the aileron hookups. I went with the flaperon setup with my JR 8103, I wanted full funcionality. Flaps pitch the plane
considerably, I programmed elevator in to conteract it. The plane will float forever, I have to work the plane to get it down
to land. The flaps make it fly almost unrealisticly. Spoilerons really help me harrier the plane in and perform walls, parachutes,
etc... The roll rate is incredible. More aileron torque would improve this too.
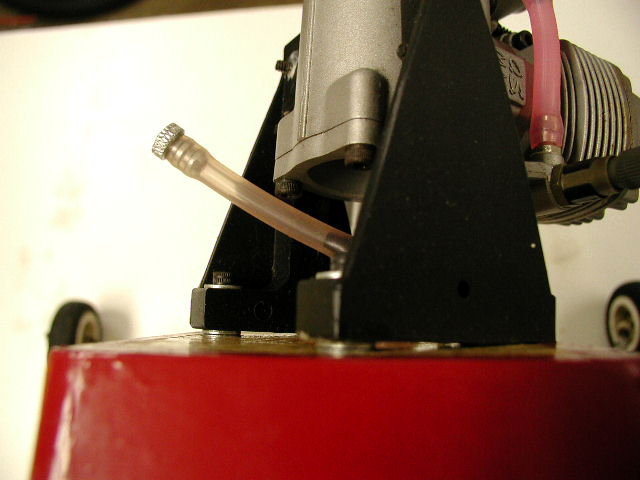
My Magic required a good amount of righ thrust
to get it to hover/torque roll. I was unable to hold it steady in a hover with the factory recommended amount of right
thrust. I like maybe 3 degrees total so far. Plus I put in some downthrust. It seemed to help as well. I also
like to put a T in the fuel line to help fill the tank. The mounted FX series engines almost require this, as the fuel line
connection is nearly inaccessible. I need to clip the line between the needle and carb though, to prevent flooding.
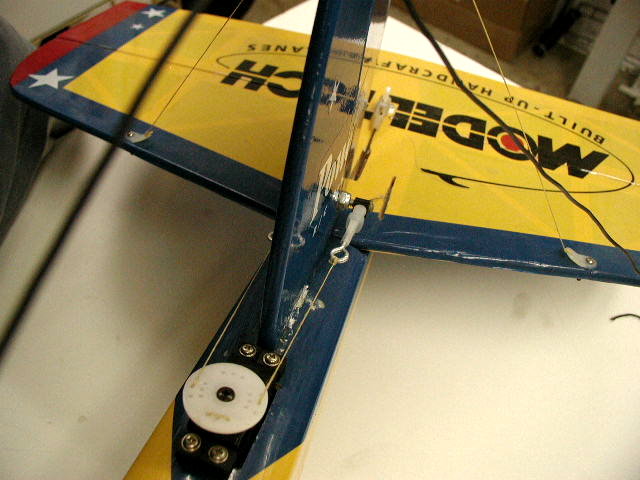
Here is the Rudder pull/pull setup. I had to "probe"
for the formers before I cut out the servo hole, It just so happens that the former is in perfect placement for a mini servo.
I added a small peice of ply strip underneath the balsa to give a hard surface for the servo screws to "bite" into. I soldered
an extension to the servo lead, and routed it up through the fuse to the receiver. After the servo was mounted, I had to make
a pull/pull control horn. I used a plan 6-32 bolt with the head cut off, with the plastic screw ons that come with
aileron control rod kits in ARFs.. I used a standard smll hitec wheel, and kevlar thread, and clevises. I slit
a 1/8" wide slot in the stabilizer for the tailwheel pull threads.
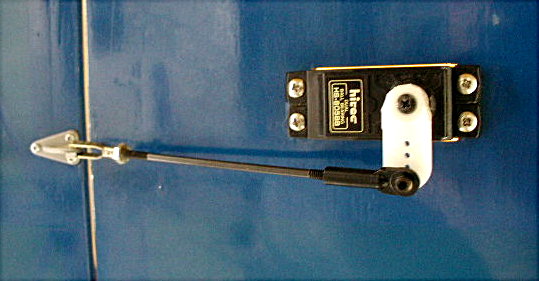
Here is the aileron setup. Simple, as usual. A hitec servo
with HD arm pushes a dual threaded 4-40 rod I got from my parts bin. I used a robart horn just for grins. Its very easy to
get slop in these ailerons, I had to choose tight fitting parts to maintain a tight fit.
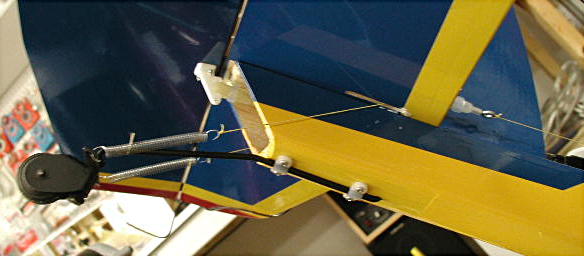
And of course, the tailwheel assembly. I was not
about to use a tailskid.... I bought this one from Ohio Superstar, its the small model Haighes type gear. I drilled a 3/32
hole in the skidplate, just like the unstructions specified for the installation of a skid. Once firmly attached, I routed
and tied the kevlar thread to the springs and the control horn on the rudder. It works quite nicely.
|

