|
MARIO MENU
Home
Training
Course 1
Course 2
Course 3
Course 4
Course 5
Course 6
Course 7
Course 8
Course 9
Course 10
Course 11
Course 12
Course 13
Course 14
Course 15
Cap Switches
Bowsers
Castle Stars
After 120 Stars
Luigi in SM64?
Cool Stuff
Mario Media
Links
Web Rings
FAQ's
About Me
Sign Guestbook
View Guestbook
E-mail Me
|
Course 14: Tick Tock Clock
Location: It's on the top floor, across from the third Bowser.
Required: 30 stars needed to open door.
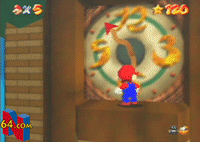
Recommended: Go into the course with the minute hand at 12 (everything stops).
|
Information: Before you jump into the clock's face, look at the minute hand. When pointing at 3, the obstacles go slow. At 6, they go crazy. At 9, they go fast. At 12, they stop completely.
The only dangers in this level are the gears, pendulums and such. They move around and may make you fall to your doom. You must get familiar with all the jumps in the game
because this level tests your skills with them. With a great mind and nimble fingers, you'll make it.
|

|
Course 14
|
Star #
|
Objective
|
Picture
|
|
1
|
ROLL INTO THE CAGE:
Just follow the path of obstacles and pits to a yellowish cage with a star. If you stopped the obstacles, this will be a piece of cake.
|

|
|
2
|
THE PIT AND THE PENDULUMS:
Just get to Star #1. Instead of going into the cage, go over it. There's another path. Just follow it until you reach two pendulums. Dodge by them and get the star. Simple.
|

|
|
3
|
GET A HAND:
GO INTO THE COURSE WITH THE MINUTE HAND POINTING AT 3! This will make it go at the slowest, but still moving. Make your way to the first big platform with a item box floating
above it. Wait for the minute hand to come to you. Jump onto it when it comes. Wait until you see star #3, then time the jump at it. Don't expect to get it on your first time.
|

|
|
4
|
STOMP ON THE THWOMP:
Go through the course as if you were getting star #2. After you climb the pole, jump ontp of the platform just above. If you stopped the obstacles, just wall kick to the
small platform above. Go right, up then left. Just follow the path until you are right in front of the bottom of the BIG hole in the wall. Long jump to the hole.
Good. From the very bottom of a slant, either left or right, fairly far from the edge. Time a triple jump onto the wall and wall jump to the conveyor belt. Then time a back
flip onto of the Thwomp. Then just jump to the star.
|

|
|
5
|
TIMED JUMPS ON MOVING BARS:
Go through the course as if you were getting star #4. After you jumped onto the elevator, go right and go up, above the big blocks. Then long jump onto the yellowish cage. Drop
down onto the lower part of the cage and tim your jumps from block to block (if they are moving) to the inner cage. Get the star.
|

|
|
6
|
STOP TIME FOR RED COINS:
It's red coin time!!!!! All of the coins are grouped together, so I'm not going to put down a list. From the start, go backward and make your way to the windup-looking things on
the wall. Just jump to each one and get the coins on them. The star appears to the left of the paired up platforms.
|

|
|
7
|
Coins = 128
This is pretty difficult, especially if it's the first time trying. The key coin stash is the blue coin box. If you don't get that, you might as well start the hunt again.
|
Special Stuff
|
1-ups
|
- On top of the pole right before the moving Mario trap.
- After the floating platforms leading to a caged platform that is out of the way.
- At the very top of the course. In an item box where the hour hand starts from.
- Jump on all three bars just to the left of the triangle near star #5.
|
|
Blue Coin Box
|
Just before the pendulums that are right before star #2.
|
[ HOME | COURSE 13 | COURSE 15 ]
|
