|
MARIO MENU
Home
Training
Course 1
Course 2
Course 3
Course 4
Course 5
Course 6
Course 7
Course 8
Course 9
Course 10
Course 11
Course 12
Course 13
Course 14
Course 15
Cap Switches
Bowsers
Castle Stars
After 120 Stars
Luigi in SM64?
Cool Stuff
Mario Media
Links
Web Rings
FAQ's
About Me
Sign Guestbook
View Guestbook
E-mail Me
|
Course 7: Lethal Lava Land
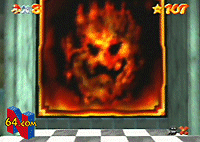
Location: In the basement, in the picture of the lava.
Required: 8 stars to get to the basement.
Recommended: Patience, for the accidental fumble into the lava.
|
Information: Lethal Lava Land is, of course, mostly lava. There are bullies(the big bowling balls with hair), eyeballs, and flames that burn. Me, well I got burnt to death about ten times when I began this course. Look to the turtle shell that appears on the fifth or sixth star when going for 100 coins.
|

|
Course 7
|
Star #
|
Objective
|
Picture
|
|
1
|
BOIL THE BIG BULLY:
You'll have to use the left path of the course to get to the bully. Unless you can warp to the wing cap and fly there avoiding the dangers of walking. When you get to the big pounder (bowling ball with hair), be ready to be attacked once you get in the ring. Keep jump kicking him until he falls off the ring. Be careful not to let him push you off first. Once you defeat it, stairs will appear leading to the star. Be careful not to stay on the stairs to long, they fall once you get on them. The star goes to the champion, Mario!
|

|
|
2
|
BULLY THE BULLIES:
Same procedure, follow the left track or fly to the island to the right of the first one. If you walk, walk to the big pounder, dodge him and get to the floating grate. The grate will float it's way to the other island. You have to push all the little pounders into the lava. Same some coins in case you fall into the lava. After you have disposed of the pounders, big pounder jumps from his island to this one. Fight him again and get what is rightfully yours (it will appear in the center of the ring).
|

|
|
3
|
8-COIN PUZZLE WITH 15 PIECES:
It's red coin time!!! This one is going to be puzzling. Take the left track to the bowser puzzle. All the red coins are there. Just one catch, the puzzle is a sliding puzzle. So one of the pieces under you might shift to burn you. So keep on jumping. The star will appear on the only safe place on the puzzle, the top right corner.
|

|
|
4
|
RED-HOT LOG ROLLING:
It's log rollin' time! Take the right track of the course to another island with some little pounders. Don't bother with them, just hop onto the grate. It'll lead you to the log. Avoid the flames that come out of the lava. Need to know some physics here. Walk the opposite direction of the log on the log. So it'll move that way while you don't fall off. Then hop off the log and follow the path to the star. You can use the wing cap to get there instead of the grate.
|

|
|
5
|
HOT-FOOT-IT INTO THE VOLCANO:
Go into the volcano when it's not erupting. Use the left path. Follow it and avoid the dangers. Then you'll get to some poles. Aim your back to the pole you want to jump to. Do not do a hand stand when you jump from pole to pole. Once you get the star, be sure of the dangers that you meet for the next star(s).
|

|
|
6
|
ELEVATOR TOUR IN THE VOLCANO:
Go into the volcano again. Head right and jump on the moving platform. Once you reach another platform, the one you're on falls. Jump on the other platform. Once you reach a pole, jump on it. Don't climb to the top, or you'll get scorched. Once the flame passes, try to get to the other pole. A good jump can make it. Climb to the top where you'll find some very small islands. Careful not to fall. Now the star is yours!
|

|
|
7
|
Coins = 133
Get the koopa shell Grab some coins floating above the lava. Be careful not to bump into any walls, or byebye koopa shell. After that, go into the volcano to finish the job.
|
Special Stuff
|
Warps
|


|
1a: Under the first eyeball, in the pit.
1b: In the middle of the lone island with the wing cap.
|
|
1-ups
|
- Above the brown hill to the left of the volcano.
- On the fire spitter behind the volcano.
- On the curved ramp at the back left corner.
- Above the brown hill at the back right corner.
|
|
Koopa Shell
|
Required: Star 5
Ignore the gate entrance and walk on. You'll see the shell-in-the-box right away.
|
|
Cap Boxes
|
- Red/Wing Cap-
- Use warp 1a to get to an island. The Island has it.
|
[ HOME | COURSE 6 | COURSE 8 ]
Copyright © 1998, 1999, 2000 Brian Dang. All Rights Reserved.
|
