|
MARIO MENU
Home
Training
Course 1
Course 2
Course 3
Course 4
Course 5
Course 6
Course 7
Course 8
Course 9
Course 10
Course 11
Course 12
Course 13
Course 14
Course 15
Cap Switches
Bowsers
Castle Stars
After 120 Stars
Luigi in SM64?
Cool Stuff
Mario Media
Links
Web Rings
FAQ's
About Me
Sign Guestbook
View Guestbook
E-mail Me
|
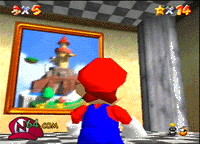
Course 2: Whomp's Fortress
Location: The right door next to the main staircase. Behind the door that has a star with a 1 on it.
Required: 1 star to get pass the door.
Recommended: Nothing
|
Information: Course 2 offers a wider range of dangers. There's the Whomp family, piranha plants, a few stomps, 'pieceful' bridge and the very famous, Bullet Bill (the huge cannonball-sized bullet). In this course, you'll have to avoid the space. The space is the space between the edge and the walls of the course. In other words a hole all around the course edge. Unlike course 1, it is very difficult to avoid the space when you don't know what you're doing. And another thing, not having many enemies doesn't mean it'll be harder to get star 7. Just have the confidence and know that the enemies yeild more than one coin.
|

|
Course 2
|
Star #
|
Objective
|
Picture
|
|
1
|
CHIP OFF WHOMP'S BLOCK:
Make your way to the top of the course. Walk toward the huge slate of rock with the band-aid on its back. Don't mistake the small ones near the big one. The Whomp will start a fight and talk about them building stuff for... blah blah blah. Just block its path and when it raises its arms, run out of there quickly. When he's flat on his face, jump on his back and butt-stomp. Do this for three times. He'll explode and the star will come to you.
|

|
|
2
|
TO THE TOP OF THE FORTRESS:
Talk about high places. Your objective, again, is at the top of the course. This time, the course has changed. The Whomp you fought before has gave in and built something for you, a tower. Avoid Bullet Bill and jump on the lowest ledge sticking out of the tower. Then jump from ledge to ledge, but be careful, they retract, so time it perfectly. At the last ledge, you will be transported up to the top of the tower. Circle around the roof and you'll see the star.
|

|
|
3
|
SHOOT INTO THE WILD BLUE:
There are two ways to get this one: 1)Talk your bob-omb buddy into opening the cannon hatch. Aim a little left of the pole and make sure the bottom crosshair is barely touching the stone structure. 3, 2, 1, blast off! You'll land safely...You'll hit a pillar and land on the middle level of the structure. Slide down the pole and get the star. 2)Stand under the side facing the cannon of the stone structure. Perform an instant backflip and when you hit a wall, wall kick towards the stone structure. You'll land on the same level as the star. Walk to the star and...
|

|
|
4
|
RED COINS ON THE FLOATING ISLE:
It's red coin time!!!
- Follow the DIRT path to meet some smiling moving walls. The coin is on the second one.
- Above the higher stomp (the blue rock). Jump on it and jump kick up to get enough height to get the coin.
- Kill the nearest piranha plant to get the coin behind it.
- Go left to find another plant guarding a red coin. Watch your step.
- Hop on the rotating platform to get the other red coin. Watch out for the blocking hill.
- Jump off that platform onto a hill. The red coin is on it.
- Travel to the top of the course to a mast on beside the tower. Watch out for Bullet Bill. Punch the wooden stick until it wobbles. Then jump kick it before it stops wobbling. The plank will fall onto an island. Jump from island to island to get it.
- This coin isn't far. Jump from island to island to get it.
The star will appear in the flower bed near the beginning. If your a beginner suggest retracing your steps. If you aren't, jump for it. |
|
5
|
FALL ONTO THE CAGED ISLAND:
Wake up the owl by climbing the nearby tree. Follow his insructions carefully. Grab his tail by holding [A] and steer. Fly to the cage near the floating islands. Fly in a circle before you drop, just to make sure you're at a safe altitude. Once you see your shadow over the cage floor, let go of the owl. What, no tweety bird? No...It's just a plain o' star.
|

|
|
6
|
BLAST AWAY THE WALL:
Be like Bullet Bill and blast your way through this one. Head towards the cannon and aim near the rotating platform. The horizontal crosshairs should be aligned with the middle coin(yellow) and the vertical crosshairs aligned with the edge of the wall. The corner of the wall will get busted and a star will appear. You can use the cannon to get up there or go around, the safer way.
|

|
|
7
|
Coins = 141
Getting 100 coins is a lot easier in this course than it is in course 1. All of the enemies carry more than one coin. Just don't try to get the stomps, the moving walls, or Bullet Bill. |
Special Stuff
|
Warps
|


|
1a: Near the first Stomp. In the corner to the opposite to the Stomp and near the cap box.
1b: Near the only pole in the course. In the left corner farthest from the tower.
|
|
1-ups
|
- Get the 5 coins at the rotating bridge near red coin 5.
- Climb the only pole in the game.
- Go around the tower and punch every wall of the tower until you get it.
|
|
Blue Coin Box
|
Down the ramp near the cannon. Just under star 3.
|
|
Cap Boxes
|
- Green/Metal Cap-
- Near the first Stomp and near warp 1a.
|
[ HOME | COURSE 1 | COURSE 3 ]
|
